
Analysis and reports
This chapter describes the reports and analyses of the POS data: the closing report of a register day, the salesperson, receipt, location and frequency reports, the sales analysis, the sales data and its archive, and the setup of digital receipts.
Before you start
- The register HAUPT / TEST and its device setup exist, as described in the setup chapter, and the register was started, sold on and closed as described in the cash office chapter.
- The sales of the day reached Business Central and were imported and posted, as described in the finance posting chapter. Sales data only exists for receipts that came into Business Central.
- No further setup is needed for the analysis or the reports.
- For digital receipts: the customer's e-mail address must be on the customer card, because that is where the app takes it from.
You can check afterwards who actually sold: the POS session records which user was signed in at which register.
Set up the digital receipt for the register
With a digital receipt the customer gets the receipt as a PDF by e-mail instead of, or in addition to, a printed one. The administrator sets this up once per cash register.
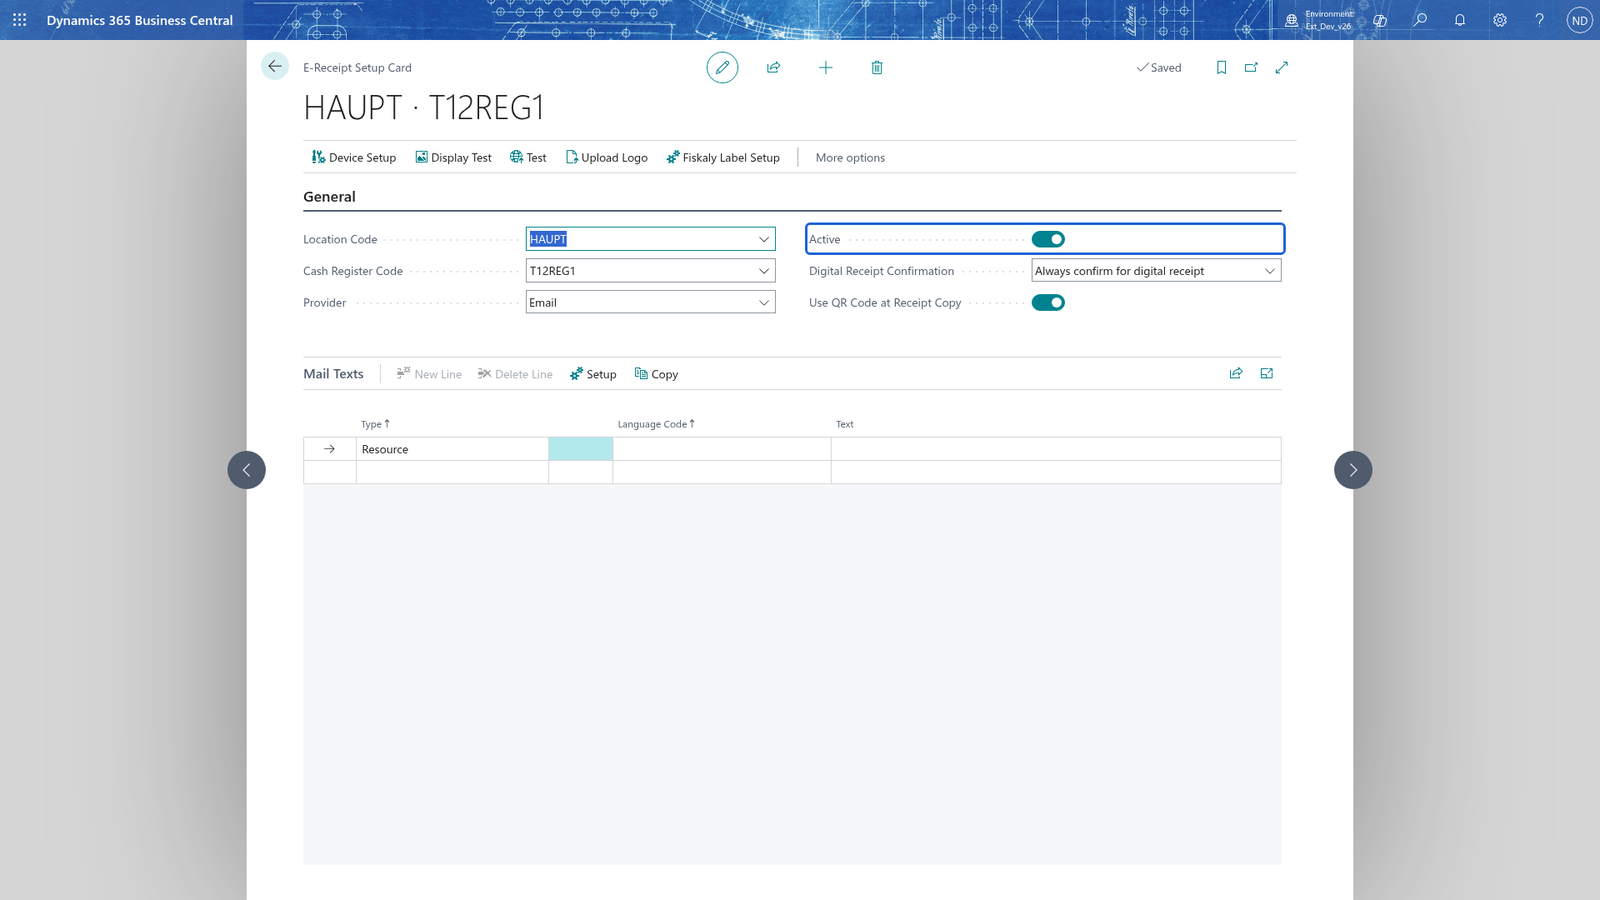
- Search for E-Receipt Setup Card and open it for Location Code HAUPT and Cash Register Code TEST.
- In Provider, choose the way the receipt reaches the customer. Email makes the PDF in Business Central and mails it to the customer.
- Turn on Active, so the register uses the digital receipt.
- In Digital Receipt Confirmation, decide when the customer is asked whether the digital receipt may be created: Always confirm for digital receipt at every receipt end, Confirm for registered customer only when a customer is signed in on the receipt, or No confirm after receipt end, which creates the digital receipt automatically at receipt end.
- To show the QR code again on a receipt copy when the original was already generated, turn on Use QR Code at Receipt Copy.
- Close the card. The line is created when you leave it.
The setup is kept per cash register, so a second register decides on its own whether it mails receipts.
Note: That is a data-protection rule, not a setting you can switch off.
Note: When the digital receipt is inactive, was refused by the customer or could not be created, the app prints the receipt as a paper document instead. So a customer never ends up without a receipt.
Create the digital-receipt setup for every register at once
With several registers, one action creates the missing setups.
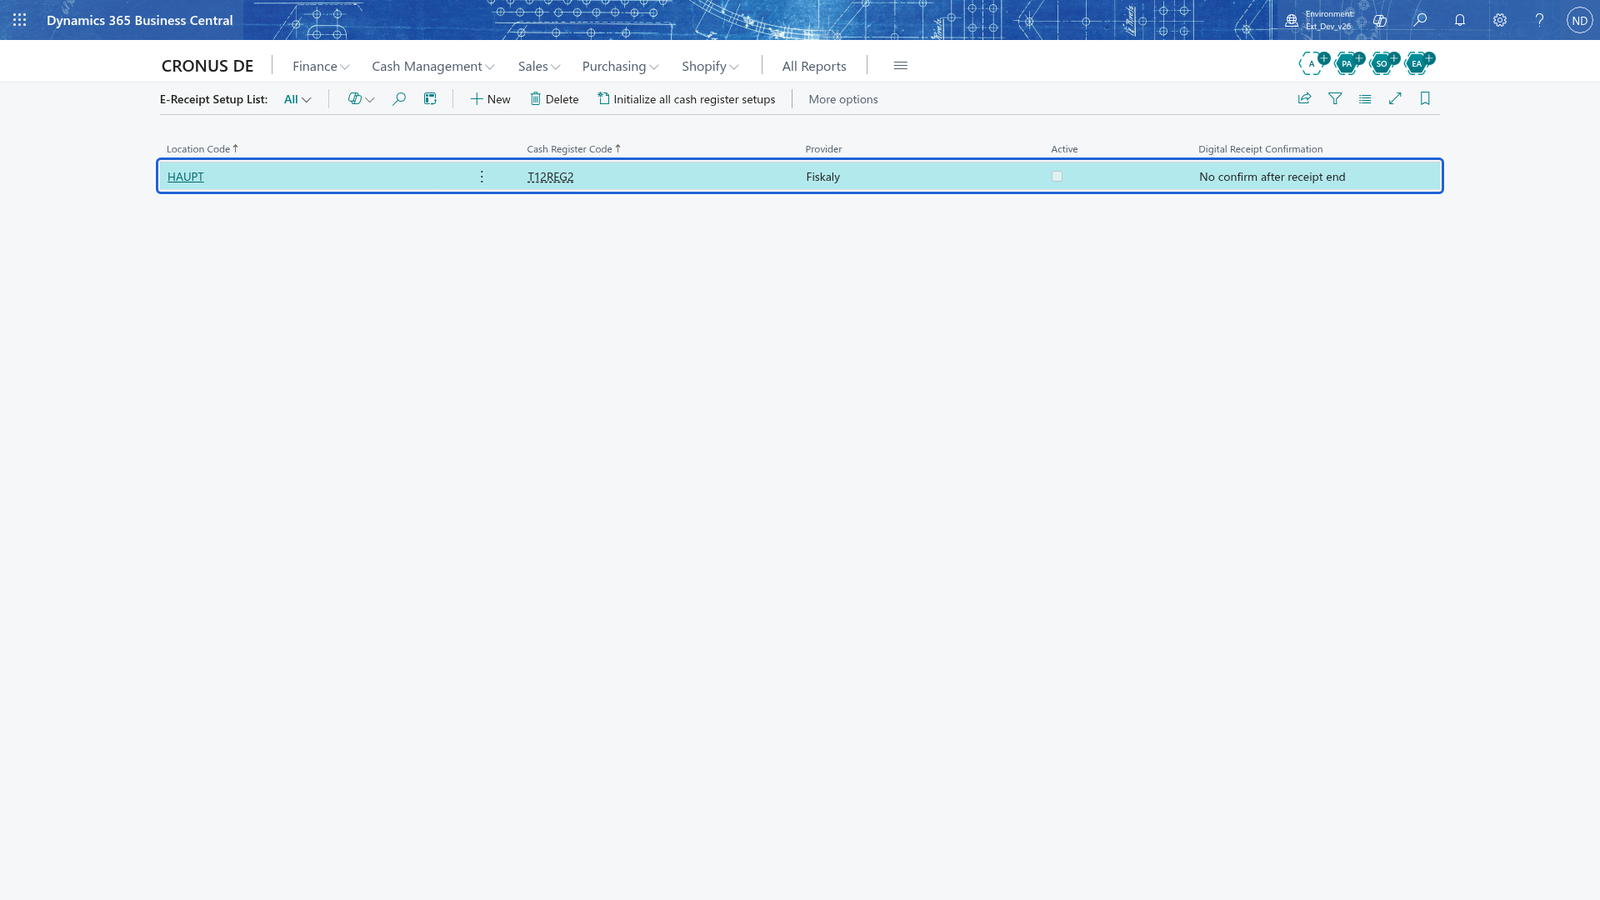
- Search for E-Receipt Setup List and open it.
- Choose Initialize all cash register setups.
- Open the line of a register to set its Provider, Active and Digital Receipt Confirmation as described above.
The list then shows one row per cash register setup with its Provider, Active and Digital Receipt Confirmation. Registers that already had a setup are kept unchanged, so you can run the action again after you add a register.
Follow the sales data of the register
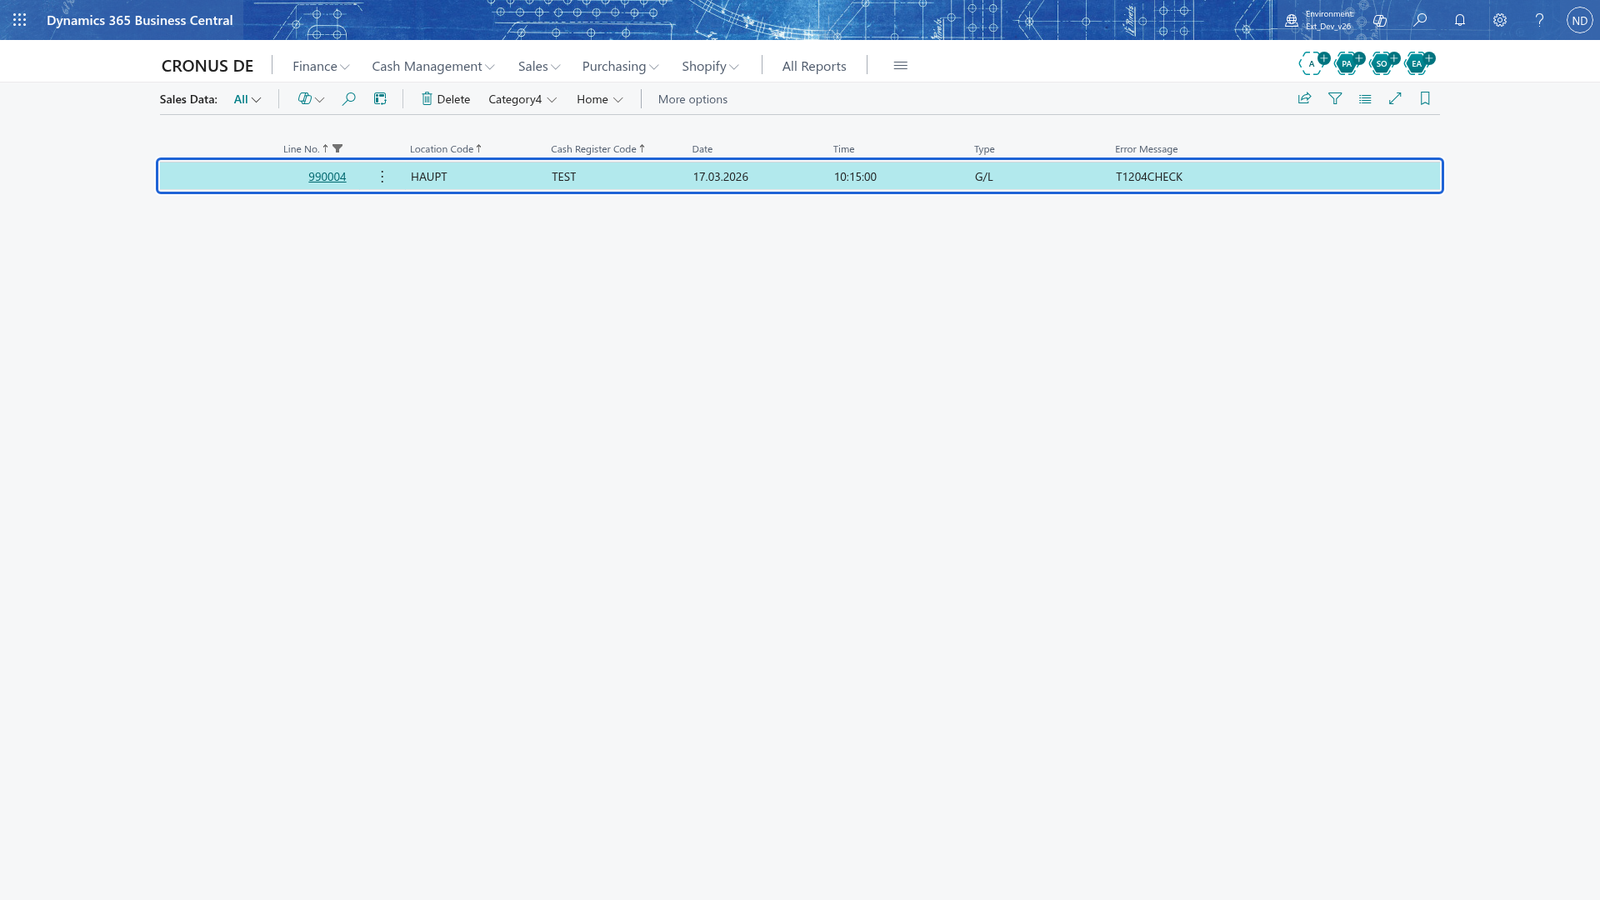
Every receipt that was exported from the register leaves a sales data record. The administrator uses the list to see whether the day's data is clean.
- Search for Sales Data and open it.
- Filter Location Code on HAUPT.
- Filter Cash Register Code on TEST.
Each row is one sales data record with its Line No., Date, Time, Type (item, resource, payment,...) and its Error Message. When every row has an empty Error Message, all the sales data of the register was imported and nothing is missing. Choose a row to open the Sales Data Card.
Note: All imports every sales data record of the current filter into the journals, Selected only the rows you marked. Each record is imported in its own transaction, so one broken record does not hold up the others. The Error Analysis action shows the Error Message of the marked record.
Correct a sales data line and import it again
If a record has an Error Message, the administrator corrects what the register sent and imports it again.
- In the sales data list, choose the row with the Error Message.
- In the Details part, find the line in Name and change its Value. Original Value always shows what the register sent.
- Choose Import.
The card says The sales data has been imported. The Error Message is then empty. If the import fails again, the card shows the message of the failed import and keeps it on the record; Error Analysis in the list shows it again later.
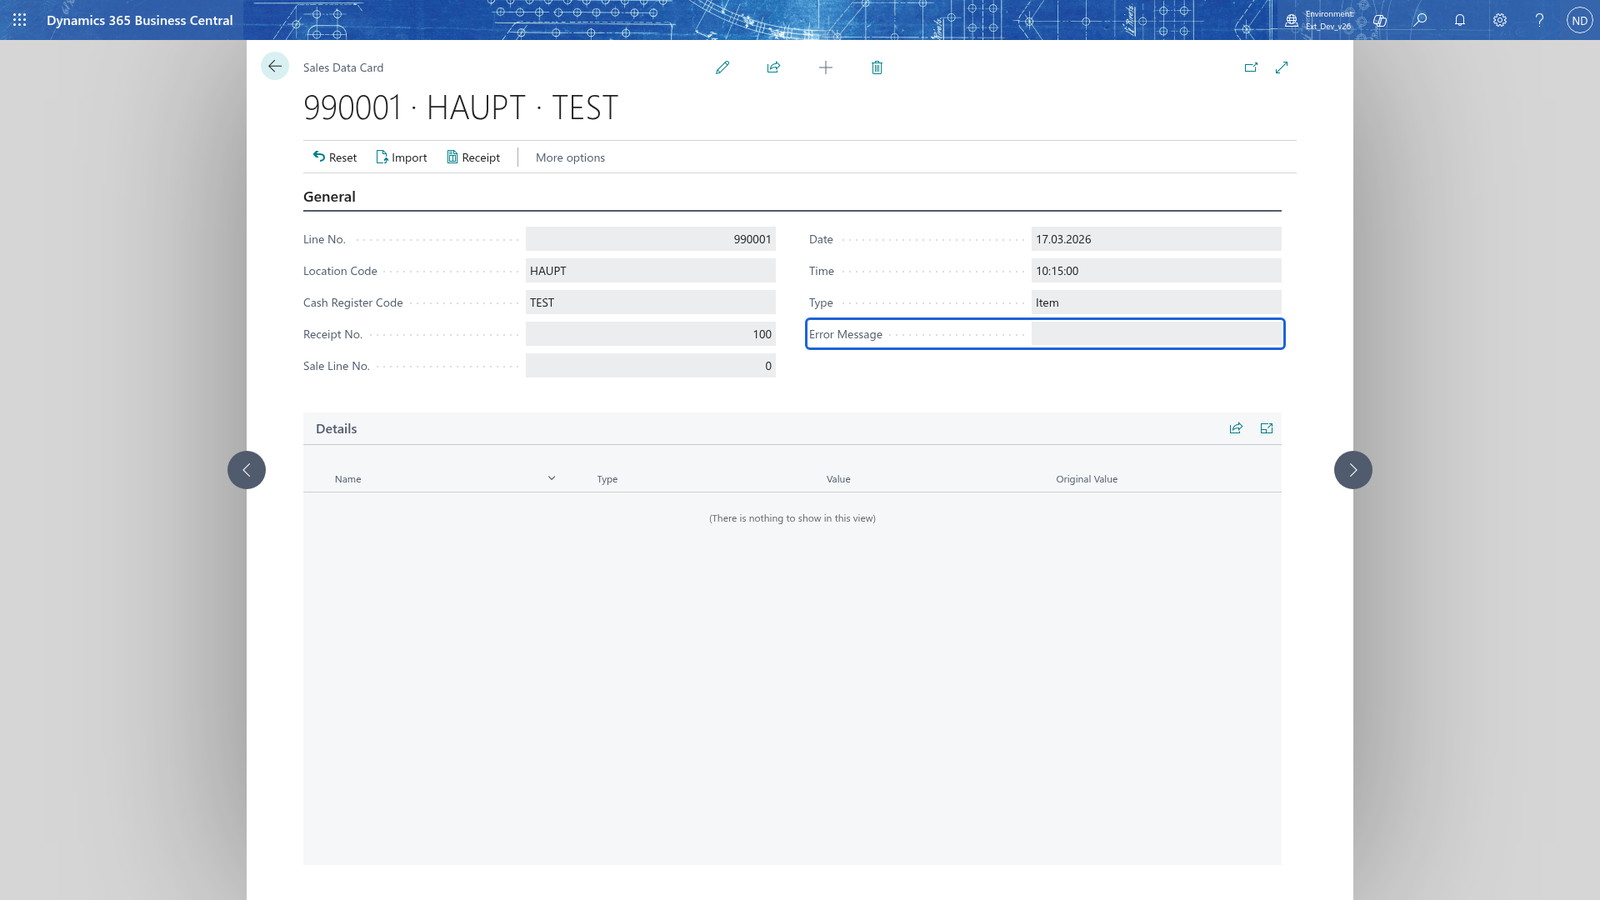
Note: Receipt on the card or in the list opens the receipt the sales data belongs to, so you can see the original sale. Reset sets every corrected Value of the record back to its Original Value; the app asks first, naming the line.
Check what was exported and imported
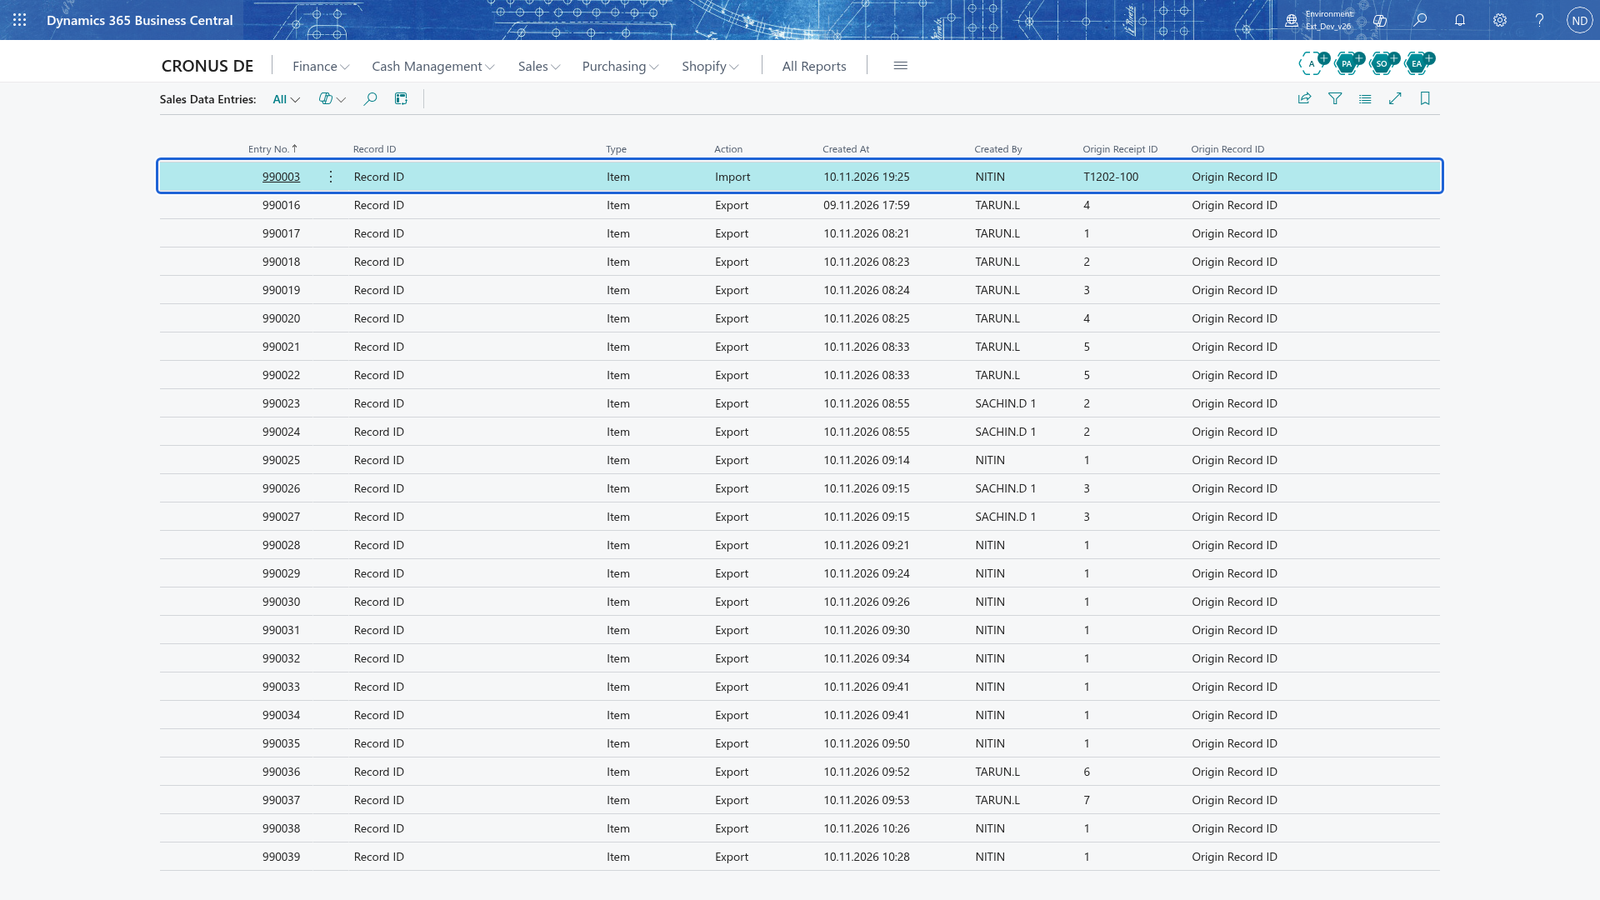
- Search for Sales Data Entries and open it, or choose Entries in the sales data list.
One row per export or import: the Entry No., the Type of the sales data and the Action.
Check the posted sales data in the archive
Imported sales data is kept in an archive. The administrator uses it to find out which journal line posted a sale.
- Search for Sales Data Archive and open it.
- Filter the list on the location, the register and the date.
- Open a row.
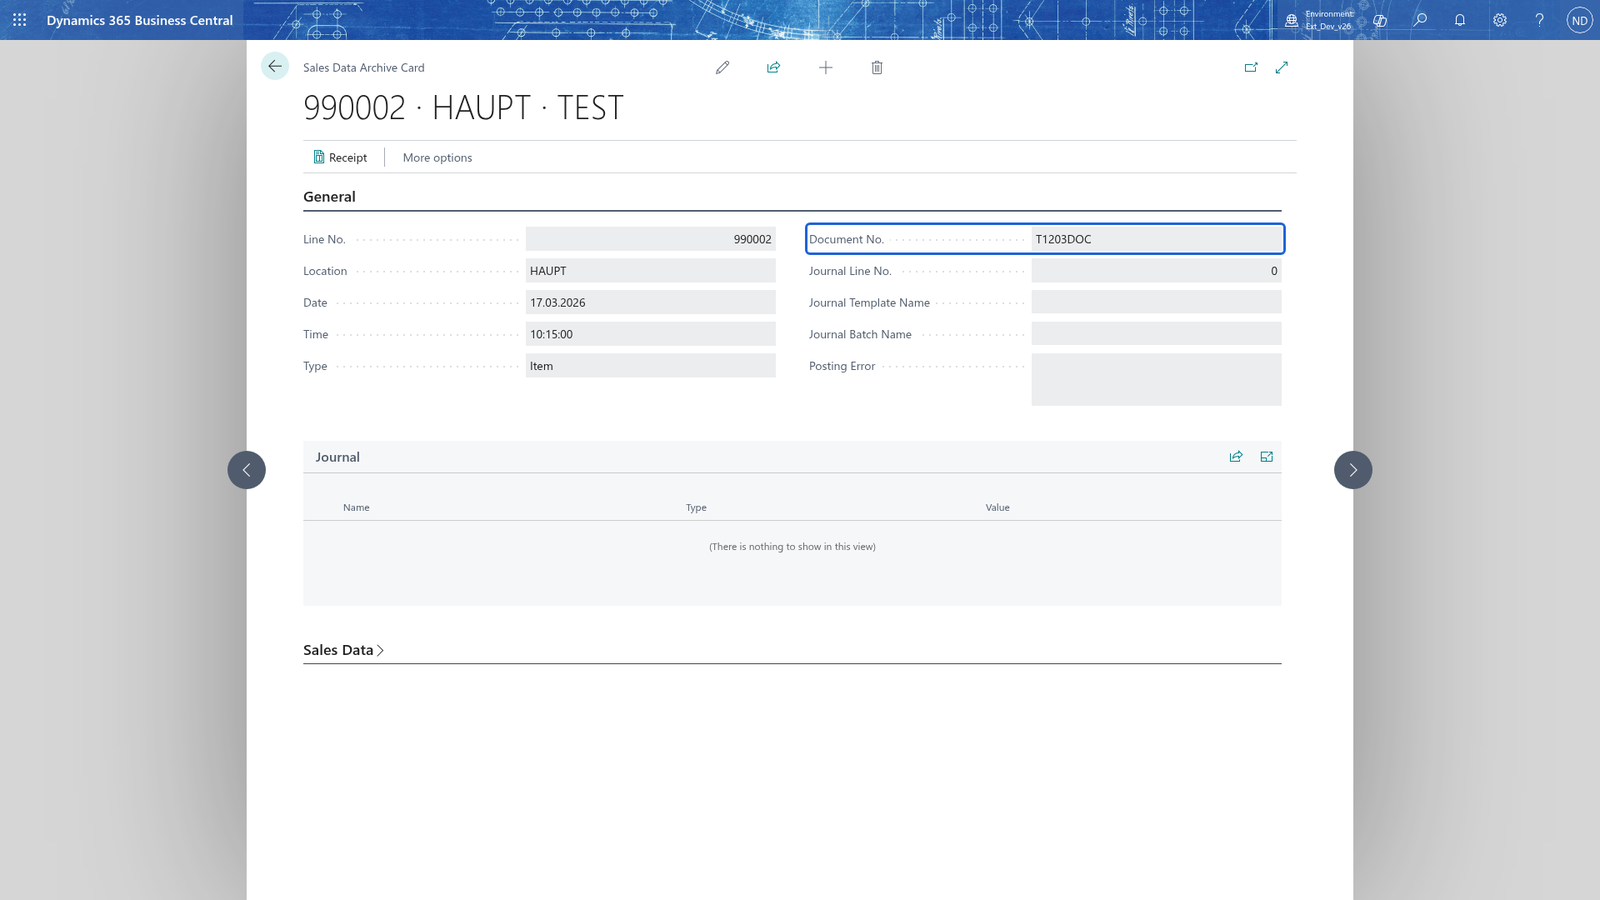
The Sales Data Archive Card shows Document No., Journal Line No., Journal Template Name and Journal Batch Name, so you see exactly which journal line posted the sale. Posting Error is empty when the posting went through and holds the message when it failed. Choose Receipt to open the archived receipt.
Read the sales figures in the Analysis page
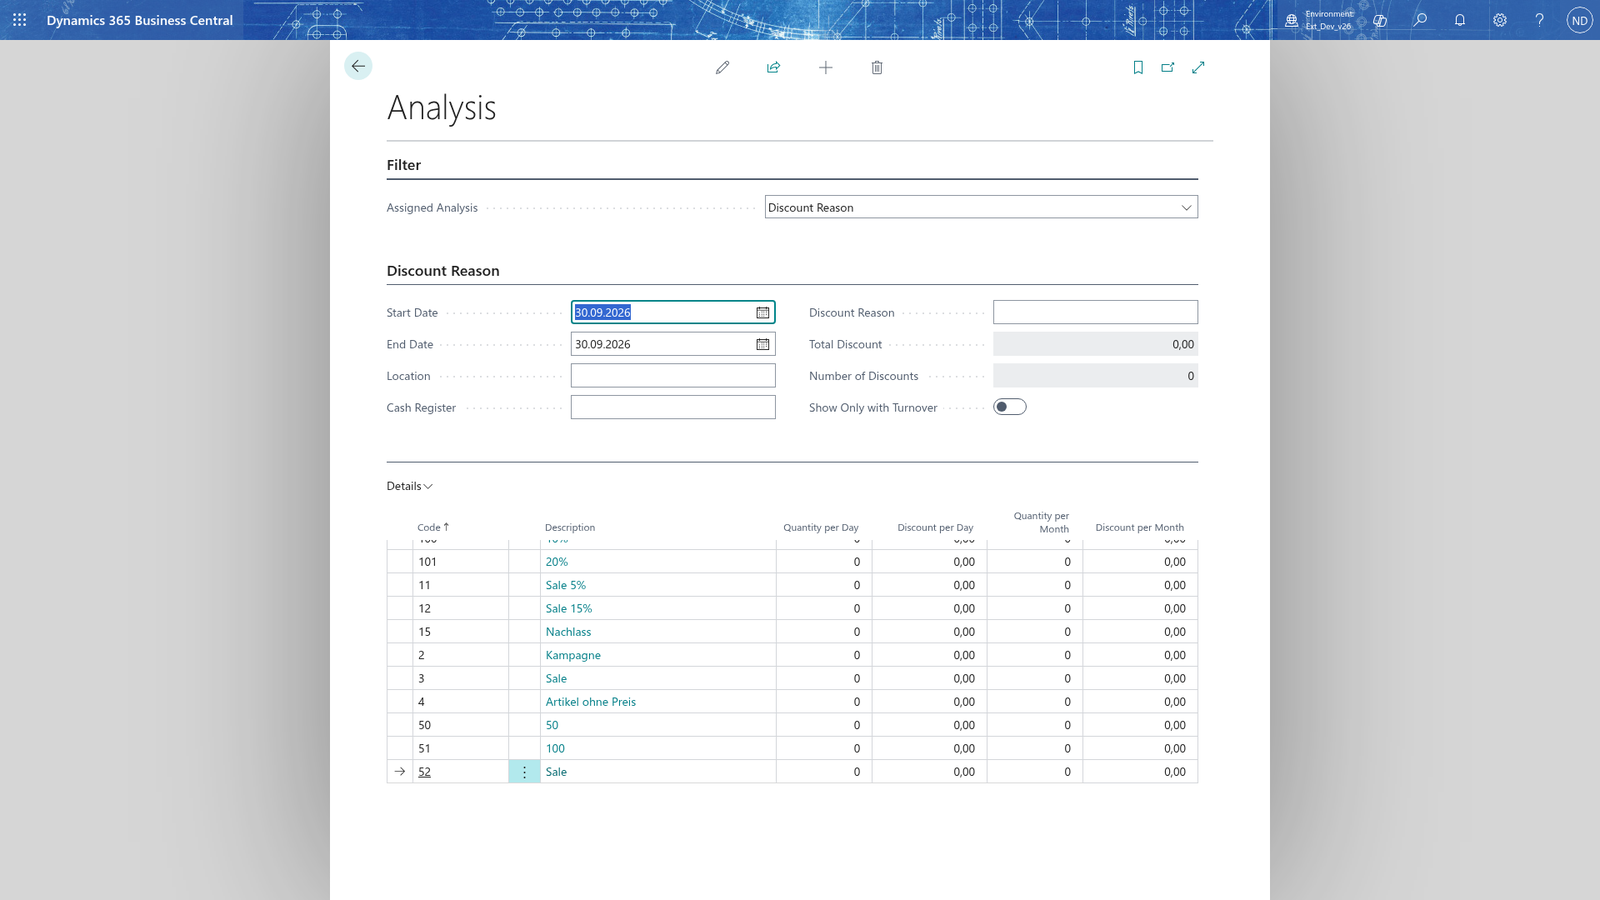
For a question about the day that is not on paper, the administrator uses the Analysis page. It has one group per subject with its own filters and read-only totals, and a Details list underneath.
- Search for Analysis and open it.
- In the Filter group, choose Assigned Analysis. Only the group of that subject is shown, so you work on one question at a time.
- In that group, enter the Start Date and the End Date of the period, for example 17.03.2026 to 17.03.2026.
How each subject answers:
- Salesperson: Quantity per Day, Turnover per Day, Quantity per Month and Turnover per Month per salesperson.
- Turnover: the item and resource turnover of a Location per day and per month, with the receipts per month and the sales customers. Per Cash Register shows the same figures per register instead of per location, and Show Last Year adds the same period of last year for comparison.
- Enter Item Category to look at one category only.
- Tender: Total Amount Per Day and Total Receipts Per Day per tender.
- Discount Reason: the discount given with each reason; enter Discount Reason 1 to see only that reason.
- Return Reason: the returned quantity and value per return reason.
- The subjects Campaign, Discount Types, Hourly Frequency, Item Turnover by Location, Item Turnover Detailed and Top or Flop work the same way: enter the dates (and the cash register, item or category the group asks for) and read the Details list below.
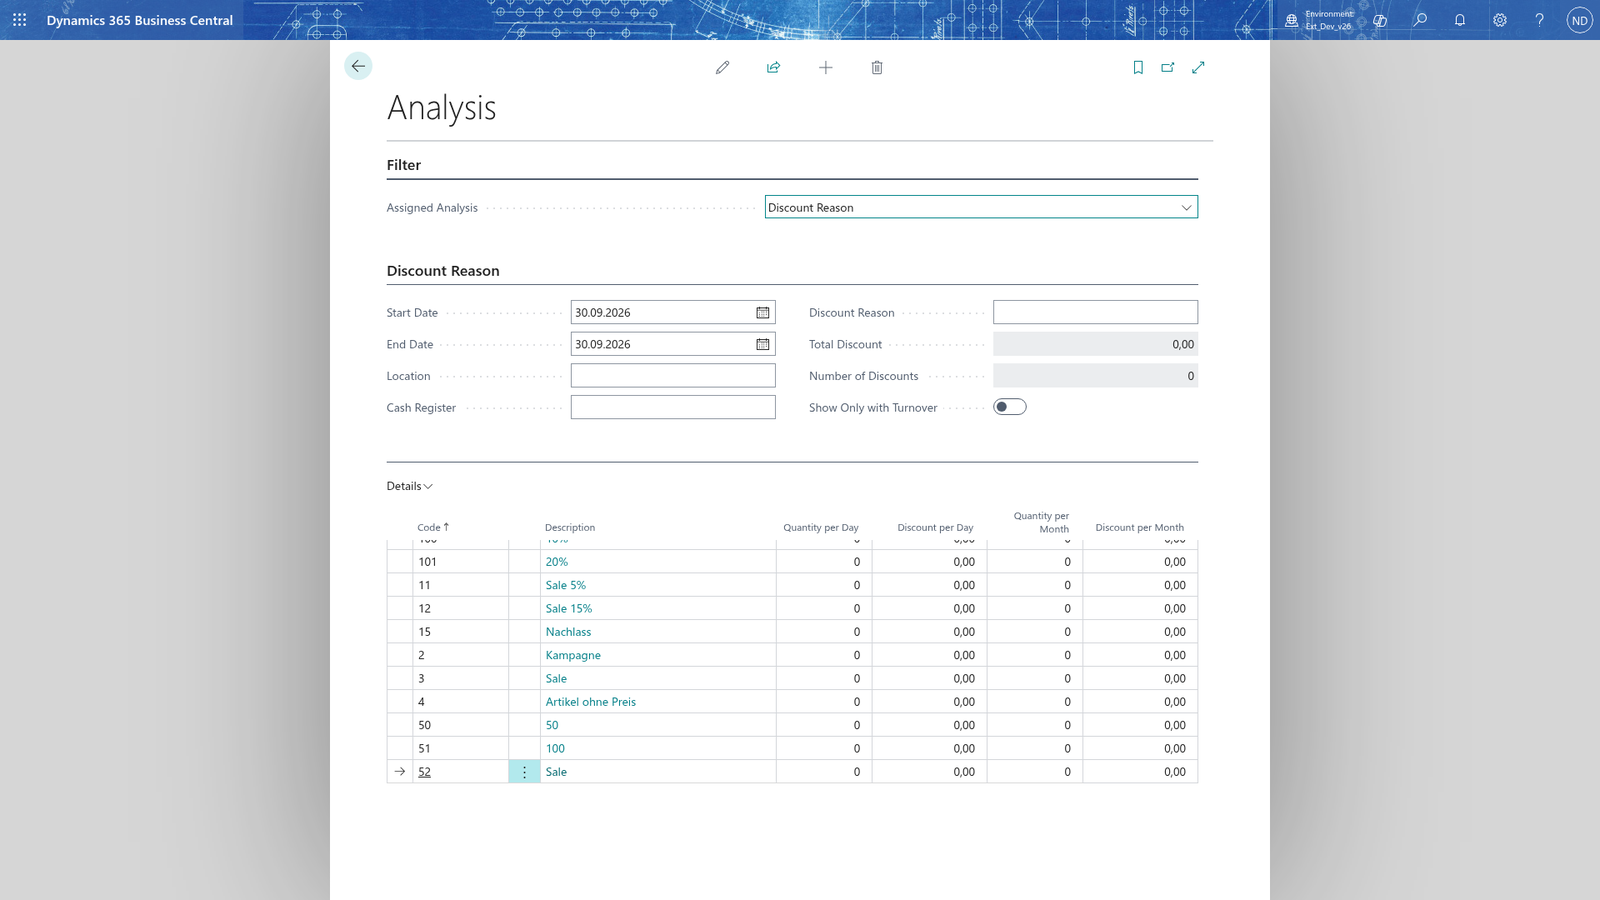
Note: Every figure on the page is read-only. The list parts calculate it from the sale, payment and discount lines of the register; nothing is typed in and nothing is posted, so looking at the analysis changes no data.
Note: A reason, category or register with no sale in the period shows zero, unless you turn on Show Only with Turnover in the subject group: it removes the rows where nothing was sold.
Print the day's reports
- POS Closing Report - after the register was closed: for each register process the cash balances (start balance, estimated balance, counted closing balance, difference, change for the next process), the cash book (deposits, payouts, cash to bank in local and foreign currencies), the turnover per tender (cash, card, voucher, voucher card, invoice, other), the sales (item, resource, voucher and voucher card sales, returns, items per receipt and turnover per receipt) and the fiscal signature. Every figure comes twice: for this process and for the whole day of the register. The request page takes Date Filter (for example
01.11.26..07.11.26) or the location, cash register and process number. - Salesperson Report - per salesperson: receipts, items and turnover, the averages per receipt, the sale/return split and the proportion of returns.
- Receipt Report - the receipts of a range: first and last receipt, with the action type (sale or payment), the number of sales and the receipt type.
- POS Location Report - per location in a date range: item, resource and voucher turnover, returns, the register statistics (receipts, sales quantity, items per receipt, turnover per customer and per item), the cash income and the other tenders, the cash book, and VAT per VAT percent.
- Frequency Report - per hour of the day: the number of receipts, the pieces sold, the turnover, the returned pieces and amount, the turnover per customer and the hour's share of the day's turnover, with a total line. Use it to see when the counter is busiest.
- Sales Analysis - a list of every sold line: description, quantity, item category, item or service, amount, location, cash register and variant, so you can filter and sort the day line by line.
Note: Reports and analysis only read the receipts, sales lines, payment lines and discount lines of the registers. Running them creates and changes nothing.
Look at the day's register processes
Each time a register is started and later closed, it runs one process - from the change float in the morning to the closing report in the evening.
- Search for Process List and open it.
- Filter Location on HAUPT and Cash Register on TEST.
- Read each row: the No. of the process, Start Time and End Time, the Start Cashier who ran the process, and Cash Start Balance and Cash Closing Balance - the cash movements the cashier counted in at the start and at the close.
- Choose Closing Report to print the closing report of the marked process.
What happens
- The sales data of every exported sale line stays in Sales Data with its Type and Error Message; its name/value lines stay on the Sales Data Card in Details, with the Value as corrected and the Original Value as the register sent it.
- Importing a sales data record posts its values into the journals of the register, each record in its own transaction. A failed import keeps its message in Error Message.
- Every export and import leaves an entry in Sales Data Entries, with the Type, the Action, Created At and Created By.
- Imported sales data is moved to the archive: Sales Data Archive and the Sales Data Archive Card keep Document No., Journal Template Name, Journal Batch Name and Journal Line No., so the journal line that posted the sale is traceable; a failed posting shows Posting Error.
- The digital receipt setup of a register holds its Provider, Active and Digital Receipt Confirmation. For every receipt that is sent digitally, the app keeps a digital-receipt transaction.
- The POS session records which user was signed in at which register.
Reports and analysis only read these records; running them creates or changes nothing. To post sales data again after a reversal, run Sales Data Reexport for the receipts, confirm the question about how many receipts are exported again, and import the sales data as described above. Reset on the Sales Data Card undoes a wrong correction.
If something goes wrong
- The sales data could not be imported:...: the register sent a value Business Central refused, for example an account that does not exist or is not allowed for the register. Open the Details of the record on the Sales Data Card, correct the Value and choose Import again.
- This record has no error message.: you chose Error Analysis on a record that imported successfully. The record is fine; look for the records whose Error Message is filled in.
- Reset the corrected values of sales data... to the values the register sent?: you chose Reset on the Sales Data Card. Answer Yes only when you want the corrected values replaced by the values the register sent.
- The receipt with number... was not found on cash register... It may already have been deleted.: the Receipt action on the sales data or on the archive card cannot find the receipt any more, for example because it was archived. Look in the archive or search the receipt lines instead.
- Enter a date filter, or run the report for a register process.: the POS Closing Report has no filter.
- Set a filter on the receipts to re-export.: Sales Data Reexport runs without a filter. Enter a filter for the receipts on the request page first.
- A digital receipt is not sent: check that Active is on for the register and that Digital Receipt Confirmation allows the receipt (or is No confirm after receipt end). When the customer refused the digital receipt, the app prints a paper receipt instead; that is intended behaviour, not an error.
- The analysis shows a salesperson, category or tender with zero: the register sold nothing through it in the period, or you filtered on another cash register. Clear the cash register filter, or turn on Show Only with Turnover to hide the empty rows.