
Set up the GDPR ToolBox and run its work in the job queue
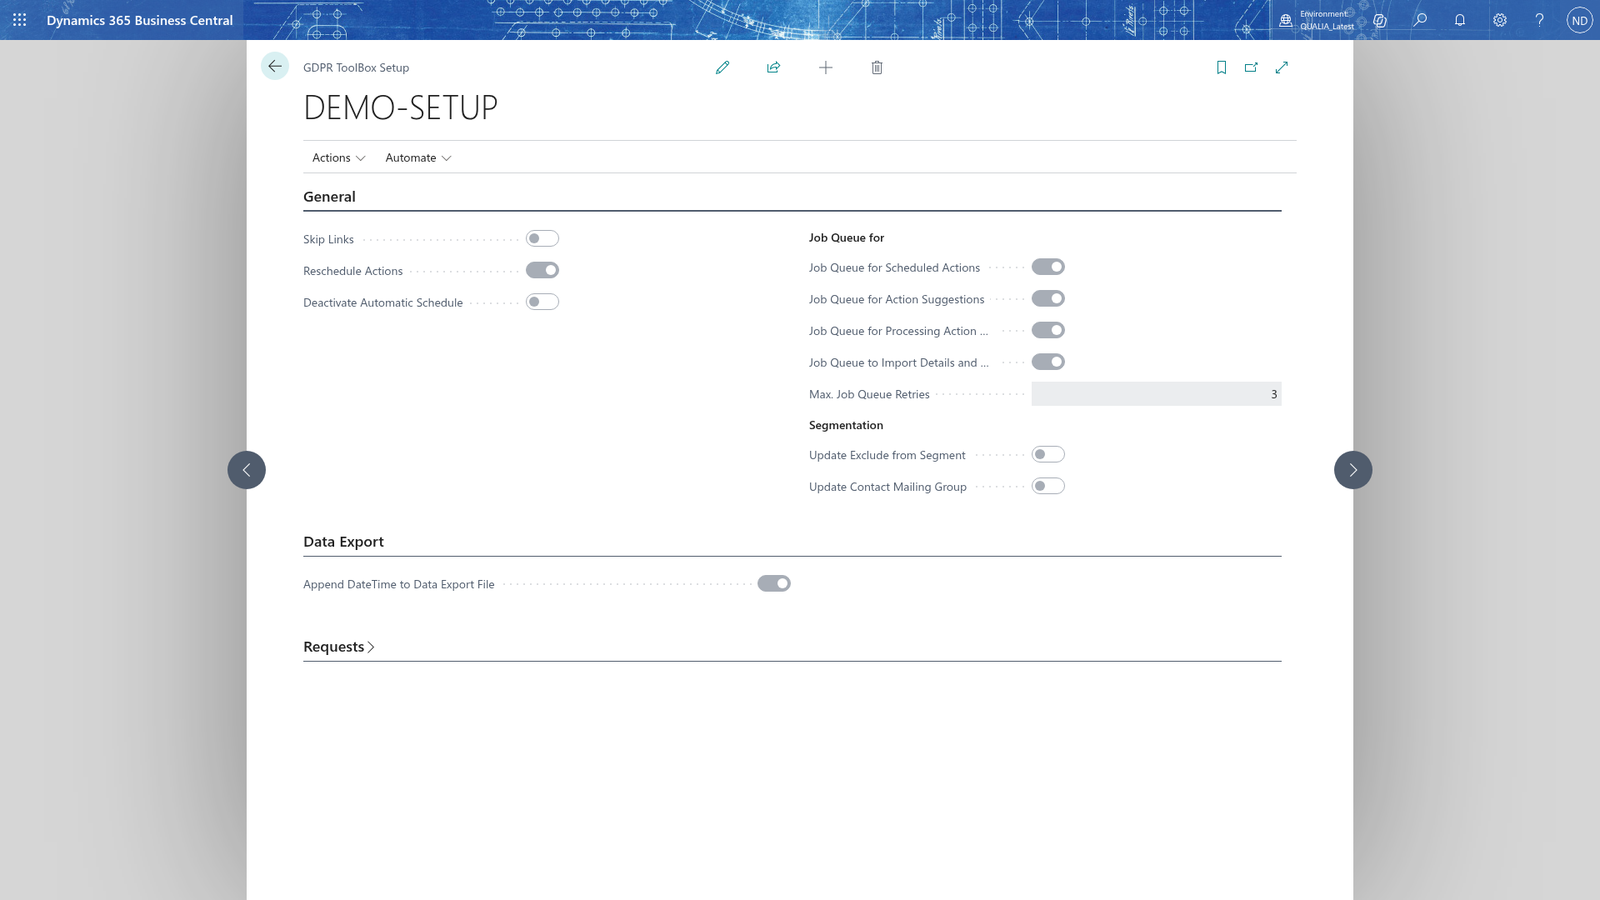
The GDPR ToolBox Setup page is where the whole app is configured: the number series for requesting persons, the status codes a request moves through, how much of the work runs in the job queue and how links, scheduling and exports behave. It is one record for the company, and every other part of the app reads it, so it must be filled before anyone can work with the app: Lena Hartmann's requests only reach the processed and done status through the codes named there, and JOBQ's jobs only do their work if the job queue toggles are on. Julia Beyer, the IT administrator at QUALIA Technik, completes this page once after the installation; after that the salespeople and the data protection officer work with the defaults.
Before you start
- Julia Beyer, the IT administrator (Setup), does the setup; the other users only use the app. Install the QUALIA GDPR ToolBox first (Extensions Management).
- In standard Business Central, search for No. Series and create the series RQ for requesting persons. The app takes the next number from this series when Lena Hartmann creates a requesting person.
- The six request statuses the setup refers to must exist: INI "Initial", AWAIT "Awaiting Response", WAIT "Wait for person", PROC "In Process", REJ "Rejected" and DONE "Done". The setup lists chapter shows where they are maintained; the same list is also reached from the lookup of Status Code on a request. Use exactly the codes you type on the setup page, because the app copies them into the requests.
- Make sure the job queue runs on the server with the account JOBQ, because the background tasks are started from there.
- Decide which of the four tasks - creating scheduled actions, creating suggestions, processing suggestions, importing details and consents - should run automatically instead of being started by hand.
The four switches of the Job Queue for group are where Julia Beyer makes that decision.
Run the setup wizard with demo data
The wizard gives you a working sample setup that shows how the app is meant to be configured. Julia Beyer uses it to see the setup lists and a sample data structure, then replaces them with QUALIA's own configuration. The wizard is optional: you can also fill in GDPR ToolBox Setup and the setup lists yourself.
- Have your Business Central administrator open the wizard QUALIA GDPR ToolBox Setup. The app does not register the wizard in Assisted Setup, so it never appears there and does not open by itself after the installation.
- On the welcome step, choose Next.
- Turn on Install Demo Data.
- In Language, choose the language of the demo data, for example de-DE.
- Choose Next.
- Choose Finish.
The demo data fills the setup lists (the request statuses INI, AWAIT, WAIT, PROC, REJ, DONE, the collection reasons, data source codes, verification codes, reschedule reasons, protection classes and levels, record types, data processing purposes and consents) and the data structure TENANT. Julia Beyer corrects the lists for QUALIA and adjusts that data structure (the data structures chapter shows how).
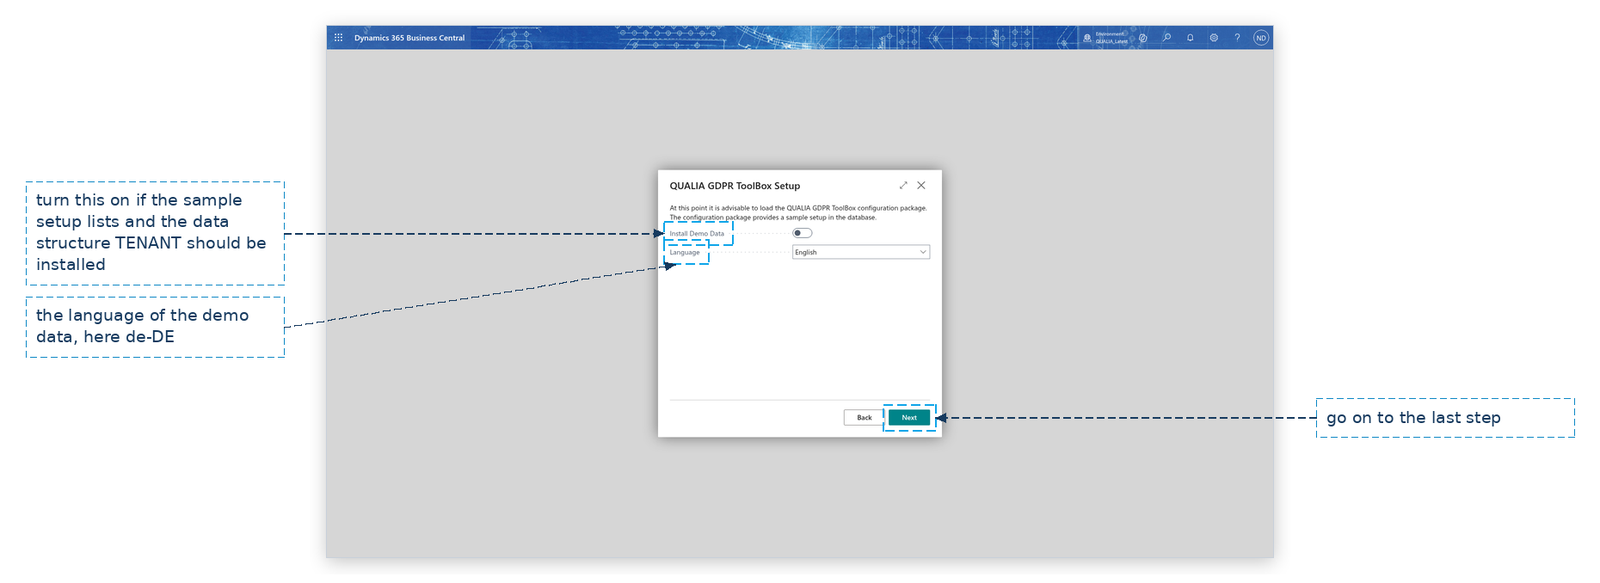
Note: The demo data is installed only when Install Demo Data is turned on; otherwise the wizard just completes the setup. So you can run the wizard a second time with the option off.
Enter the defaults on the GDPR ToolBox Setup page
- Choose Search, enter GDPR ToolBox Setup and choose the link.
- In Request No. Series, enter RQ. Lena Hartmann's next requesting person is numbered from it.
- In Initial Status Code, enter INI. A new request starts with this status.
- In Await Response Status Code, enter AWAIT, and in Wait Status Code enter WAIT - these two codes classify requests that are waiting internally or with the person.
- In Process Status Code, enter PROC, in Rejected Status Code enter REJ and in Done Status Code enter DONE.
- Turn on Reschedule Actions. When a record with personal data is changed, the app moves its scheduled actions with the standard reschedule reason.
- Leave Skip Links off as long as users should see the links to the scheduled actions in the master data.
- Turn on Append DateTime to Data Export File so that each export file gets its own name and an earlier export is not overwritten.
- Turn on Update Exclude from Segment if the app should set the Exclude from Segment flag on contacts from the processing purposes that remain.
- Turn on Update Contact Mailing Group if the mailing group that a processing purpose carries should be set on the contact while the purpose is active.
- Close the page.
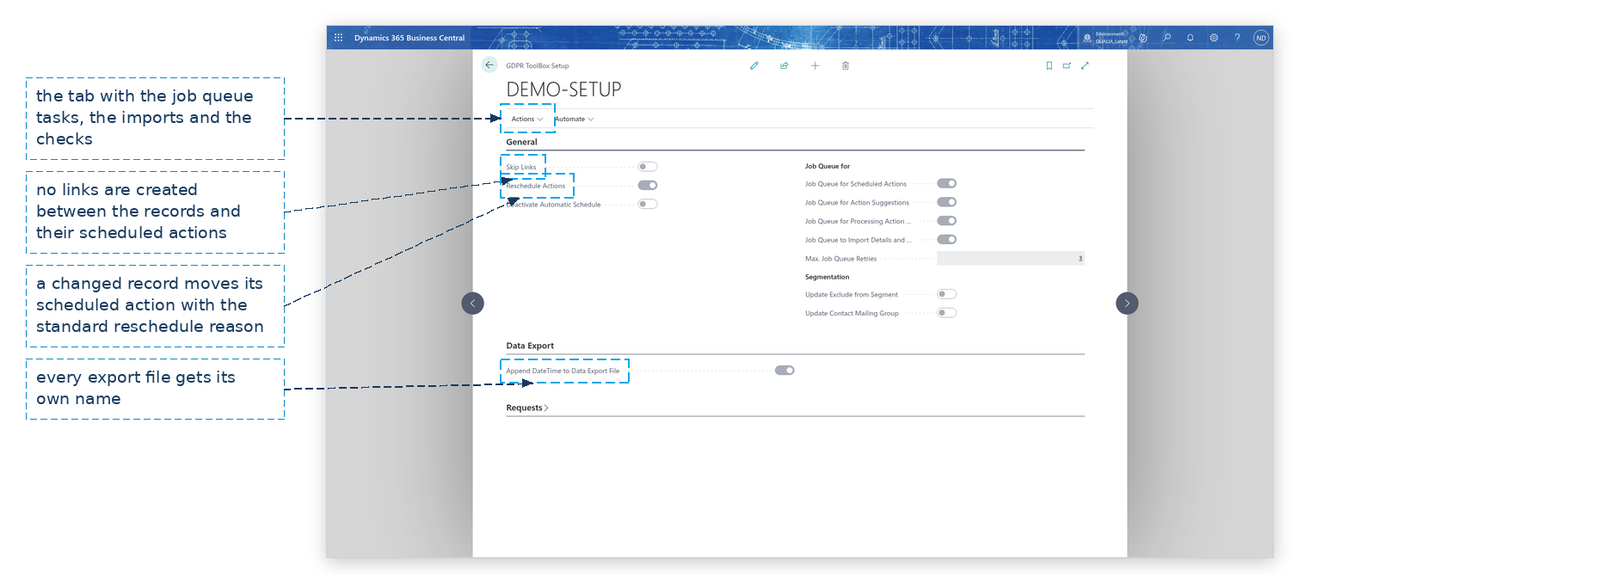
Note: GDPR ToolBox Setup is one record for the whole company; you cannot create a second one or delete it, and every user works with the same values.
Note: The six status codes also drive the request stacks of the GDPR role center, so keep them aligned with the request statuses.
Turn the four background tasks over to the job queue
The app's four tasks are creating scheduled actions, creating suggestions, processing suggestions and importing details and consents. Each of them is started from the setup as a Business Central job queue entry.
- In the Job Queue for group, turn on Job Queue for Scheduled Actions.
- Turn on Job Queue for Action Suggestions.
- Turn on Job Queue for Processing Action Suggestions.
- Turn on Job Queue to Import Details and Consents.
- In Max. Job Queue Retries, enter 3.
- On the Actions tab, choose Scheduled Activity. The app creates the job queue entry for this task with the retry count and opens the Job Queue Entry Card.
- Enter the start time and the run interval on the job queue entry, and set it to Ready so JOBQ runs it.
- Choose Action Suggestion on the Actions tab, give that entry its start time and set it to Ready.
- Choose Process Suggestions. That action runs the same suggestion task as Action Suggestion, so it opens the entry that the previous action created; you do not set anything up again.
- Choose Process Import Details and Consents. This action starts the details import only, so the entry it creates processes the GDPR details import buffer; give it a start time and set it to Ready.
- The consents are not in this entry: they are written by their own task. Either write them yourself - open Import Consents and choose Import - or let the job queue do it: open Job Queue Entries, choose New, set Object Type to Run to Codeunit, enter consents in the lookup of Object ID to Run and pick the codeunit that imports the consents, give the entry its start time and set it to Ready.
If you also created the entry in step 11, you now have four job queue entries: the scheduled actions, the suggestions (Action Suggestion and Process Suggestions use one entry), the details import and the consents import. The rows the job queue cannot write stay in the import buffer with an Error Message so you can fix them.
Note: Each job queue action creates the entry only if it does not exist yet; if it does, the action opens that entry. So you can open an entry again later without creating a second one.
Note: The retry count is written to the entry when it is created. If you change Max. Job Queue Retries afterwards, an entry that already exists keeps its old count until you update it in the job queue entry.
Note: A new job queue entry is created with status On Hold and does nothing until you set a start time and set it to Ready, so nothing runs by accident.
Note: Turning a Job Queue for switch off puts the job queue entry of that task on On Hold if it already exists, and turning it on sets it back to Ready. The suggestion task runs as soon as Job Queue for Action Suggestions or Job Queue for Processing Action Suggestions is on.
Let the setup create the scheduled actions for the old data and check the keys
The app has watched only the records that were created after the setup. The old records need one batch run, and the key check shows whether the tables can be searched quickly for one person.
- On the Actions tab of GDPR ToolBox Setup, choose Creating Actions from Historical Data. The message "The scheduled actions from the historical data have been created." appears.
- On the Actions tab, choose Performance Check. The message "The performance check has been completed. The results are shown in the performance results." appears and the performance results show one line per table and key.
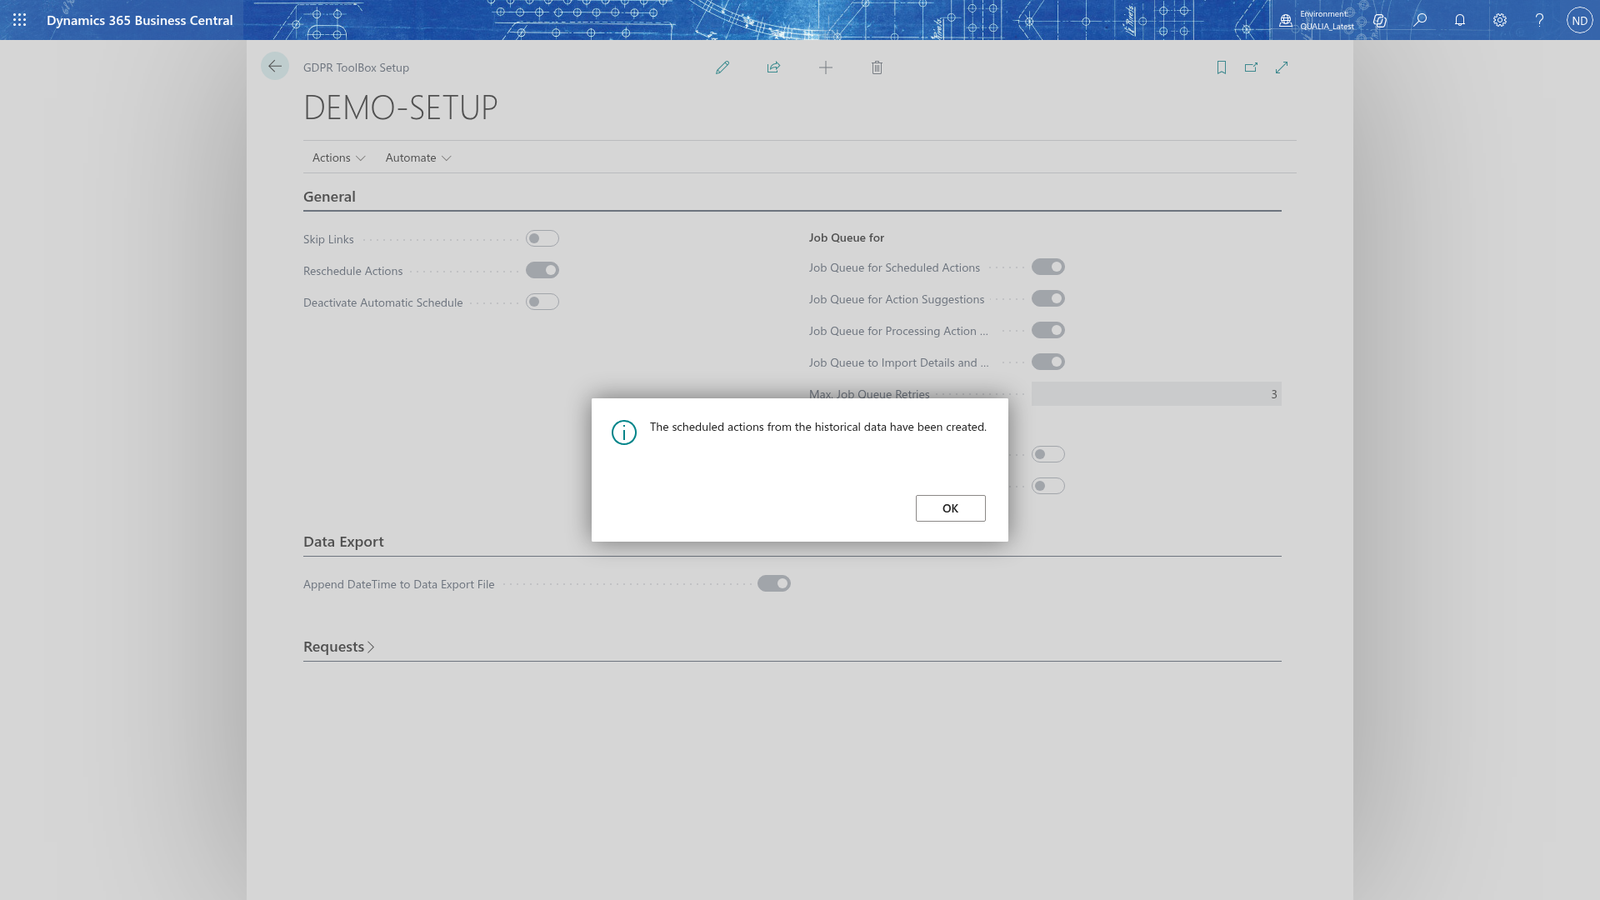
Note: The historical run looks at the tables whose table guideline turns on Manual Scheduled Action and Reschedule Actions, creates an entry for every record that has none yet, and leaves records that already have one alone. A record whose table has no guideline gets no action at all.
Open the other work from the setup page
The setup page is also the entry point for the imports, the correction work and the app version.
- Choose Import GDPR Details to open the import buffer for the GDPR details; you review each row's Error Message and Processing Status here and delete rows that failed, or let the job queue task write the rows into the details.
- Choose Import Consents to open the import buffer for the data processing consents; here you can also choose Import to write the marked rows into the master data consents at once.
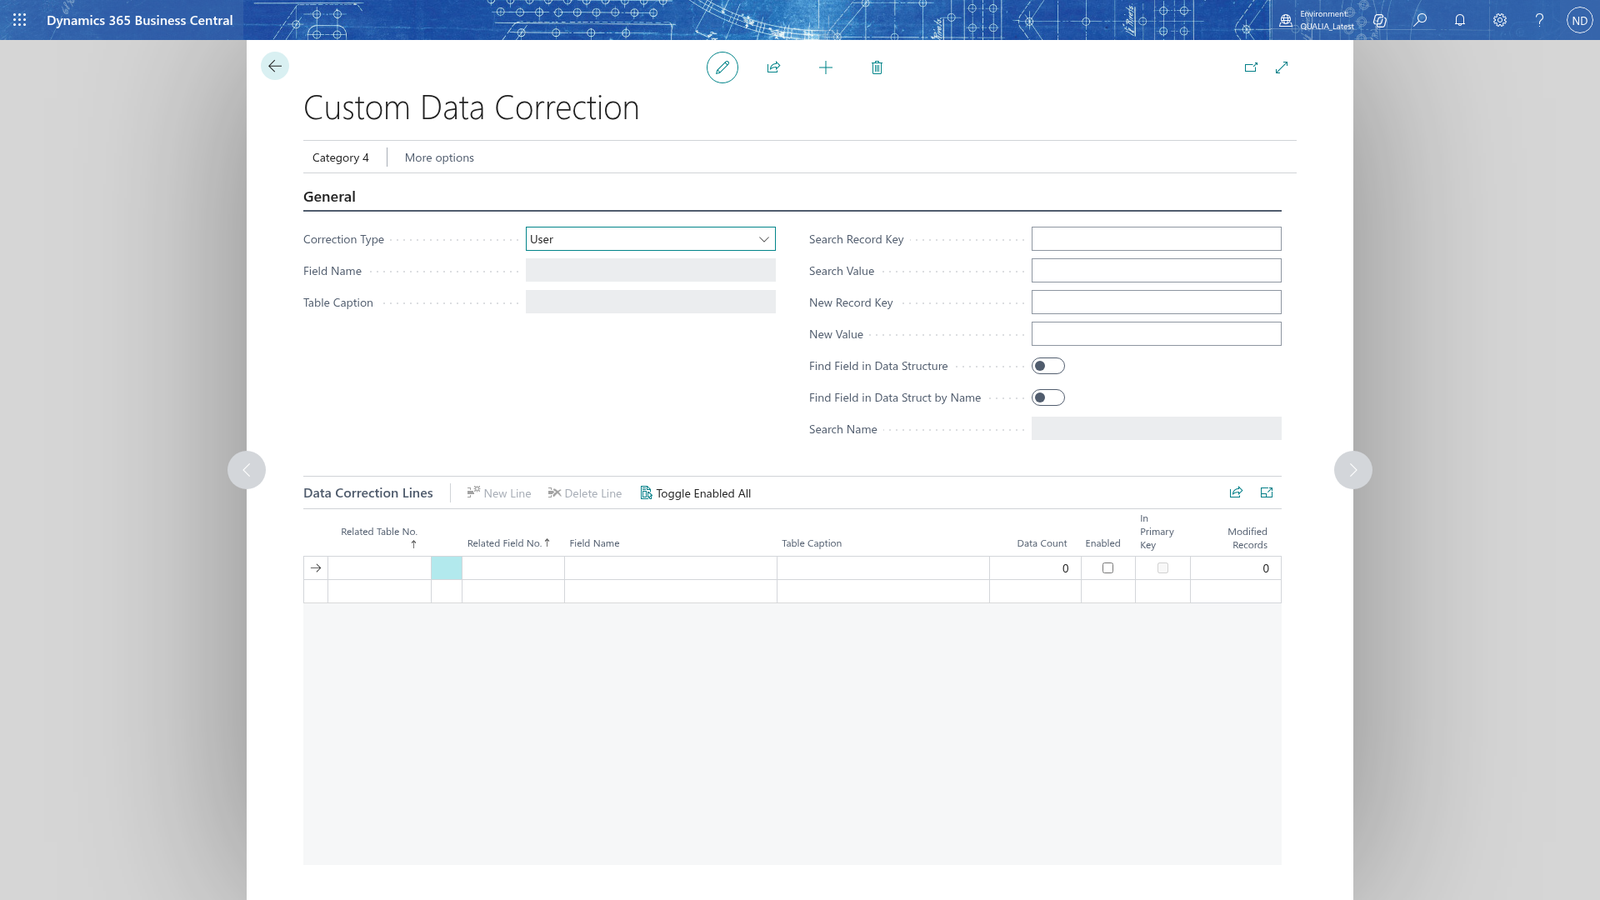
- Choose Custom Data Correction to find and replace a wrongly entered personal value in the data structures.
- Choose Update Record Links URLs when the links to the records were created for another client type; the message "The URLs of the record links have been updated." confirms it.
- Choose About GDPR ToolBox. This opens a web search for the app's name, not a version page.
- To see which version is installed, choose Retrieve License Information; the message "License is active. App ID: <id>, Version: <version>" names the app and version that is installed.
Note: Delete Modul Data on the Actions tab is a reset button, not a way to clean up one record. It asks "Are you sure you want to delete all GDPR data? This deletes all GDPR requests, suggestions, scheduled actions and user permissions. The data cannot be restored." and then answers "The GDPR module data has been deleted." The setup, the data structures, the table guidelines and the setup lists stay; requests, scheduled actions, suggestions (including the archive and the error log) and user permissions are gone and cannot be brought back.
Example: Julia Beyer sets up the GDPR ToolBox at QUALIA Technik
Julia Beyer installs the QUALIA GDPR ToolBox. Her administrator opens the wizard QUALIA GDPR ToolBox Setup for her - the wizard is not in Assisted Setup - she turns on Install Demo Data, picks de-DE as the Language and chooses Finish. The demo data fills the setup lists and the data structure TENANT, which Julia Beyer corrects for QUALIA.
Then she fills GDPR ToolBox Setup:
| Field | Value | What it means at QUALIA Technik |
|---|---|---|
| Request No. Series | RQ | The first requesting person is RQ-0001 (Tanja Weiss) |
| Initial Status Code | INI | A new request starts as "Initial" |
| Await Response Status Code | AWAIT | Lena Hartmann waits for an internal answer |
| Wait Status Code | WAIT | Lena Hartmann waits for Tanja Weiss |
| Process Status Code | PROC | The request is being processed |
| Rejected Status Code | REJ | The request cannot be met |
| Done Status Code | DONE | The finished Information, Export and Delete requests of Tanja Weiss |
| Job Queue for Scheduled Actions | yes | JOBQ creates the scheduled actions |
| Job Queue for Action Suggestions | yes | JOBQ creates the suggestions |
| Job Queue for Processing Action Suggestions | yes | JOBQ runs the approved suggestions |
| Job Queue to Import Details and Consents | yes | JOBQ writes the GDPR details import buffer |
| Max. Job Queue Retries | 3 | A failed task is repeated up to three times |
| Reschedule Actions | yes | A changed record moves its scheduled actions with the default reschedule reason AUTO |
| Append DateTime to Data Export File | yes | Tanja's export zip carries the date and time in its name |
She chooses Scheduled Activity, Action Suggestion and Process Import Details and Consents on the Actions tab and gives these job queue entries a start time and the status Ready, so JOBQ runs them; Process Suggestions opens the entry that Action Suggestion created, because both actions use the same suggestion task. Process Import Details and Consents starts the details import only, so she also creates an entry for the consents import in Job Queue Entries (Codeunit, and the consents import task in Object ID to Run) and sets it to Ready. JOBQ then writes both import buffers from the trade fair Lena collected there: the GDPR detail of Tanja Weiss (data source EXPO, campaign Trade fair 2026) and her consent EMAIL on contact 1000.
Then she chooses Creating Actions from Historical Data. The invoice SINV0001 of Mietwerke Berlin GmbH, posted 30 November 2018, is the old record: its guideline for Posted Sales Invoice says Anonymize after 10Y from Posting Date, and Manual Scheduled Action and Reschedule Actions are on for that table, so the run creates the entry for the invoice. On the Scheduled Actions list Lena Hartmann now sees the invoice, next to the scheduled actions of contact Tanja Weiss (1000) and customer Mietwerke Berlin GmbH (2000). Finally she chooses Performance Check; the results show Contact's primary key as Full Match and the key "Bill-to Customer No." of Posted Sales Invoice as Partial Match.
From now on, Lena Hartmann creates requesting person RQ-0001 with her Information request, and the status moves INI to DONE through the codes of this setup page.
What happens
- The wizard installs the demo data in the chosen language and closes.
- The setup page holds one record; each value is read again when the app needs it, so a change takes effect from the next action. The next requesting person is numbered from series RQ, and a new request starts with the Initial Status Code.
- The four job queue actions create standard Business Central job queue entries (you can list them under Job Queue Entries) for the app's tasks, with the retry count from Max. Job Queue Retries as their parameter. The Action Suggestion and Process Suggestions actions share one entry. Process Import Details and Consents creates the entry of the details import only; the consents import needs its own entry in Job Queue Entries or Import on the Import Consents page.
- Creating Actions from Historical Data adds scheduled action entries for the records that existed before the setup, so nothing is forgotten when you move an existing company to the app.
- Performance Check writes the key check result per table and key; the performance results page is where you read them.
- To correct a value, open GDPR ToolBox Setup again, change it and close the page.
- Delete Modul Data deletes the app's work data (requests, scheduled actions, suggestions, error log, archive and user permissions) after asking you; the setup and the master data of the app stay. Use it only deliberately, because it cannot be undone.
If something goes wrong
- "Max. Job Queue Retries must be between 1 and 100.": The app refuses 0 (a failed job would be dropped silently) and more than 100 (the job queue would keep retrying). Enter a value between 1 and 100.
- The message "Created the Job Queue Entry for codeunit <n>." is the normal answer when an entry did not exist yet: enter the start time on the entry and set it to Ready.
- A job queue task does not run. The entry is still On Hold or has no start time, the job queue is not running on the server with JOBQ, or Deactivate Automatic Schedule is turned on: it switches the job queue work off for all four tasks. Turn it off, then check the entry.
- A record created in a personal-data table has no scheduled action. The database table trigger is not active for that table, so the app does not see the new record; activate it in the standard Database Table Trigger Setup (the opening chapter shows where). Check also that the table has a table guideline.
- A scheduled action was not created for an old record. Old records are not watched until you run Creating Actions from Historical Data, and only tables whose guideline has Manual Scheduled Action and Reschedule Actions on are walked. Turn those two flags on in Table Guidelines, run the action again and check the Scheduled Actions list.
- The message "The performance check has been completed. The results are shown in the performance results." is the normal answer of Performance Check: open the performance results and look at the table and key that shows Partial Match or No Match.
- The links to the scheduled actions open the wrong client. The links were created for another client type; choose Update Record Links URLs on the setup page.
- A request does not show in the stack of its status on the role center. The role center groups the requests by the status codes on the setup page. Check that the code on the setup page is exactly the code of the request status.