
Drivers
This section is about driver master data: the data you keep about each driver. A driver is a person who drives a vehicle on a trip or a route. You manage drivers on the Drivers list and a Driver Card. A driver is a Business Central employee: you link the card to the employee with Employee No., and the card holds the driving licence details and whether the driver is allowed to drive. Drivers are chosen on trips and routes by planners and office users, not by the drivers themselves, and a driver needs no Business Central user account.
Create a driver from an employee
- Choose the search icon, enter Drivers, and open the list.
- Choose New to open a blank Driver Card.
- In Employee No., enter the number of the employee who is the driver, or choose the lookup and pick the employee. Name fills in automatically from the employee and you can't change it.
- In Licence No., enter the number printed on the driver's licence.
- In Licence Categories, enter the categories on the licence, separated by commas: A for motorbikes, B for cars and vans, C for trucks.
- In Licence Expiry Date, enter the date until which the licence is valid.
- Leave Blocked empty so the driver may drive.
- Close the card.
The driver now appears on the Drivers list with the number, employee, name and licence details.
Note: The driver is saved only once the employee is chosen, so a driver card can't be saved without one.
Refuse a second driver for the same employee
- Choose the search icon, enter Drivers, and open the list.
- Choose New.
- In Employee No., enter the number of an employee who already has a driver.
The app refuses the driver and shows a message that the employee already has a driver. Choose OK on the message, enter another employee number for the new driver, or close the card without saving.
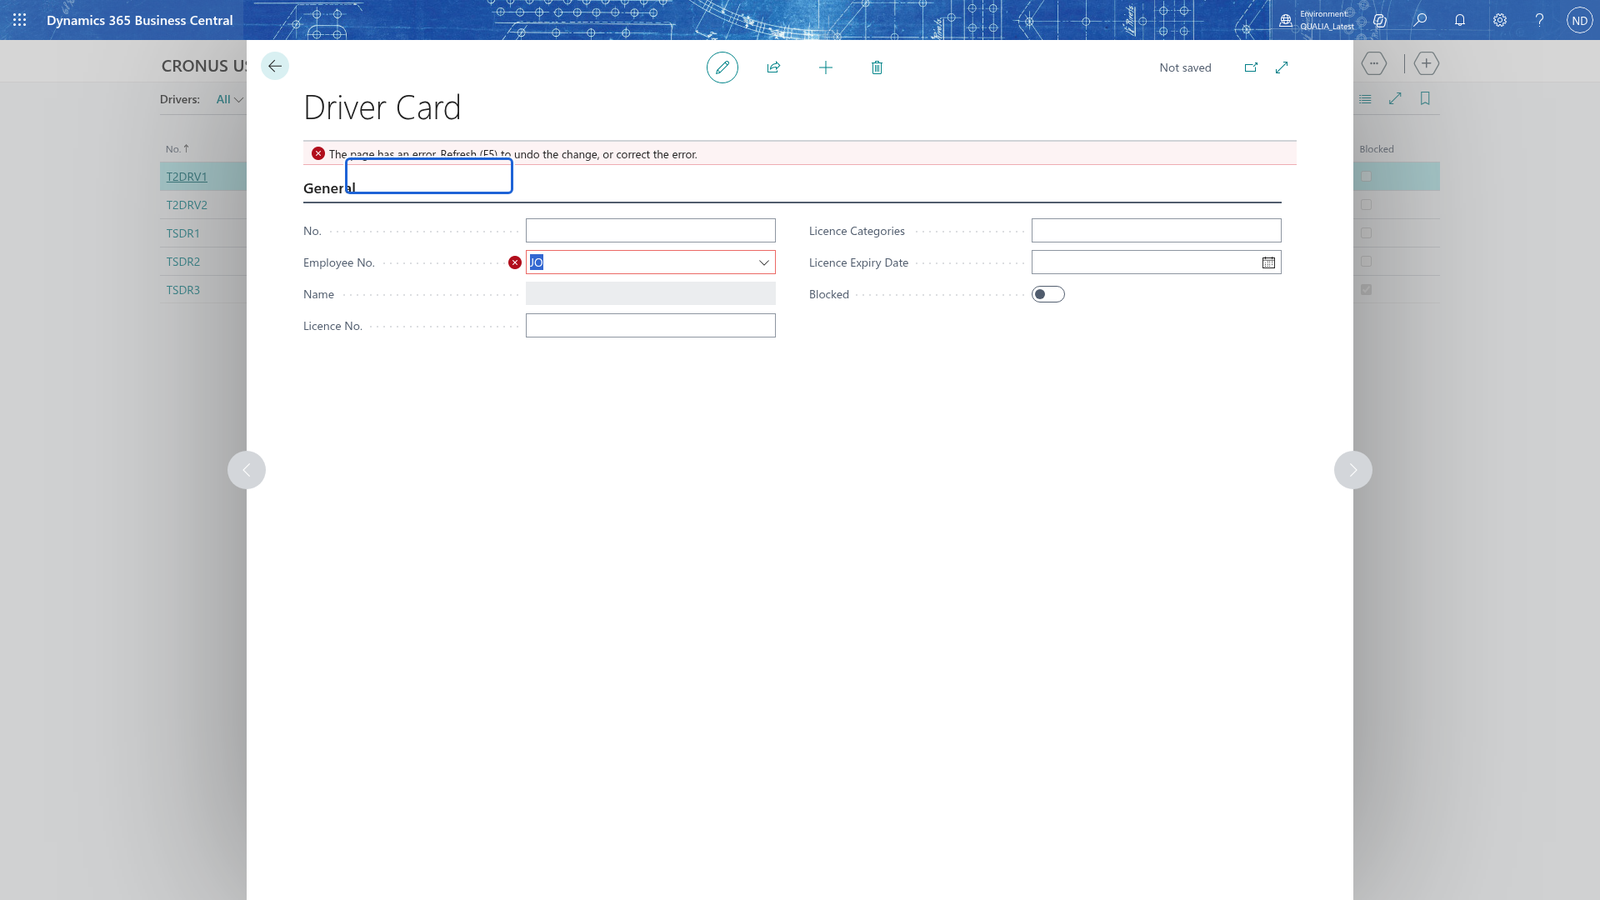
Note: An employee can be the driver of only one record, so you always know which driver a trip or route means. Create only one driver per employee.
Block a driver from driving
You don't have to delete a driver who no longer drives: block him so he can't be used any more without losing him.
- Choose the search icon, enter Drivers, and open the list.
- Select the driver and choose Edit (or open the Driver Card).
- Turn on Blocked.
- Close the card or leave the list.
The Driver Card and the Drivers list show the driver with Blocked turned on.
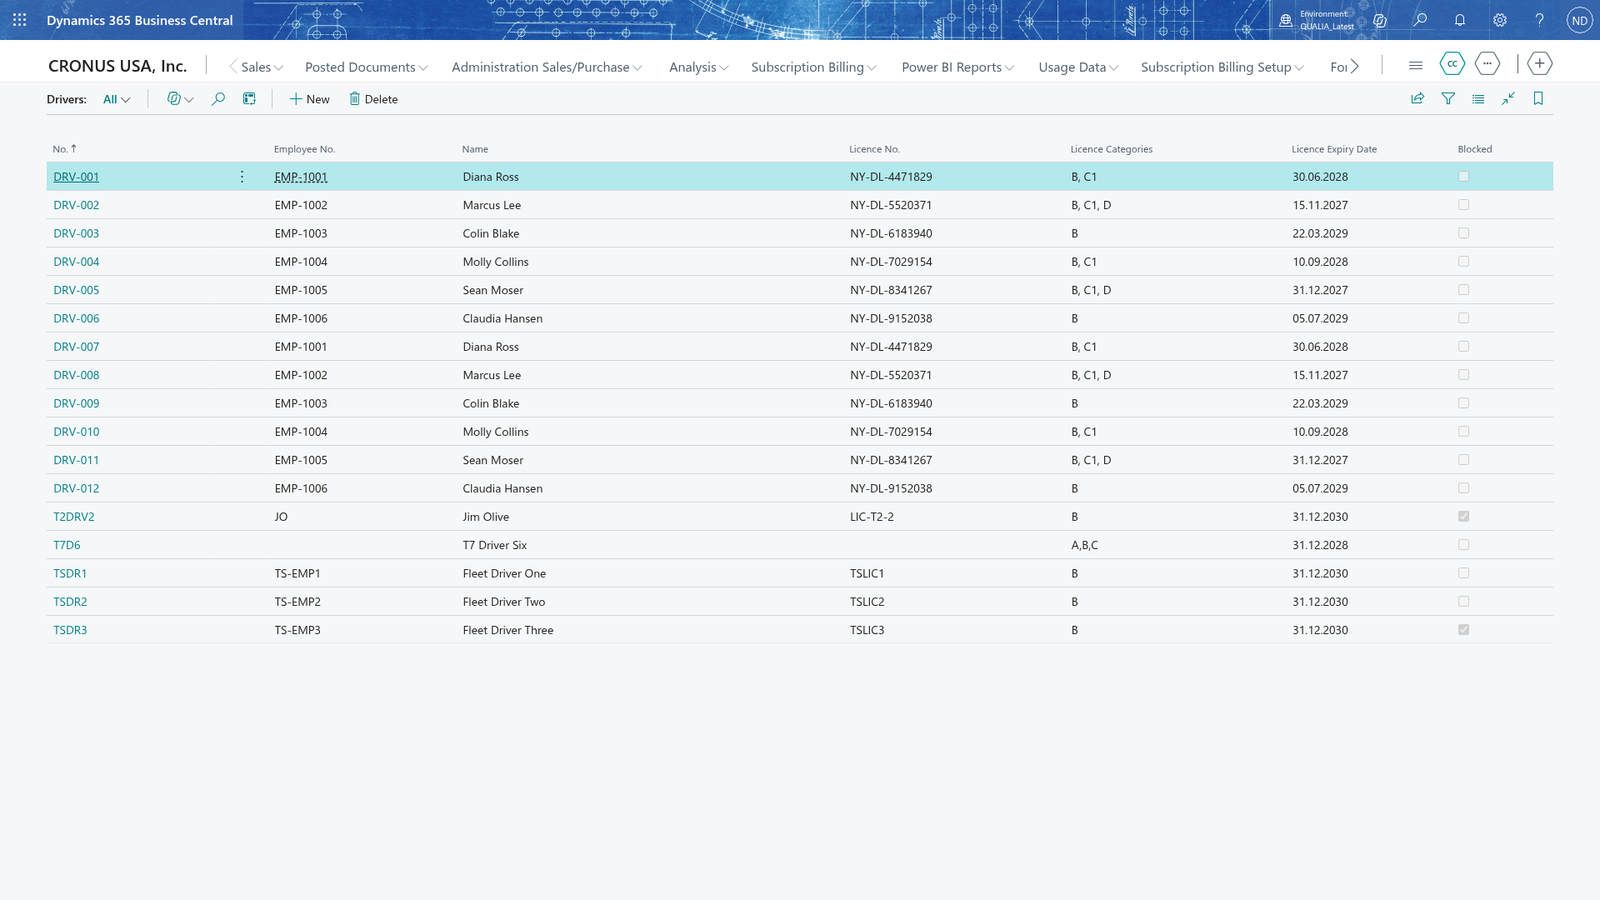
Note: Set a driver to Blocked instead of deleting him. While trips or routes still use the driver, he can't be deleted: the app refuses the deletion and names what still refers to him. Blocking stops the driver from being used without losing that history.
See that a blocked driver can't drive
In the three examples below, posting first checks the trip itself: End Odometer must be greater than Start Odometer, and the vehicle may not be disposed or in the workshop, and it must have an insurance document of the vehicle that covers the trip date. If one of these fails, the app shows that message first. Make sure they pass so you see the driver message.
- Choose the search icon, enter Vehicle Logbook, and open the list.
- Choose New to open the Trip Card.
- In Vehicle No., choose the vehicle.
- In Driver No., choose the blocked driver.
- In Date, enter the trip date.
- In Start Odometer, enter the odometer at the start of the trip.
- In End Odometer, enter a higher reading.
- Close the card.
- On the Vehicle Logbook list, select the trip's line and choose Post.
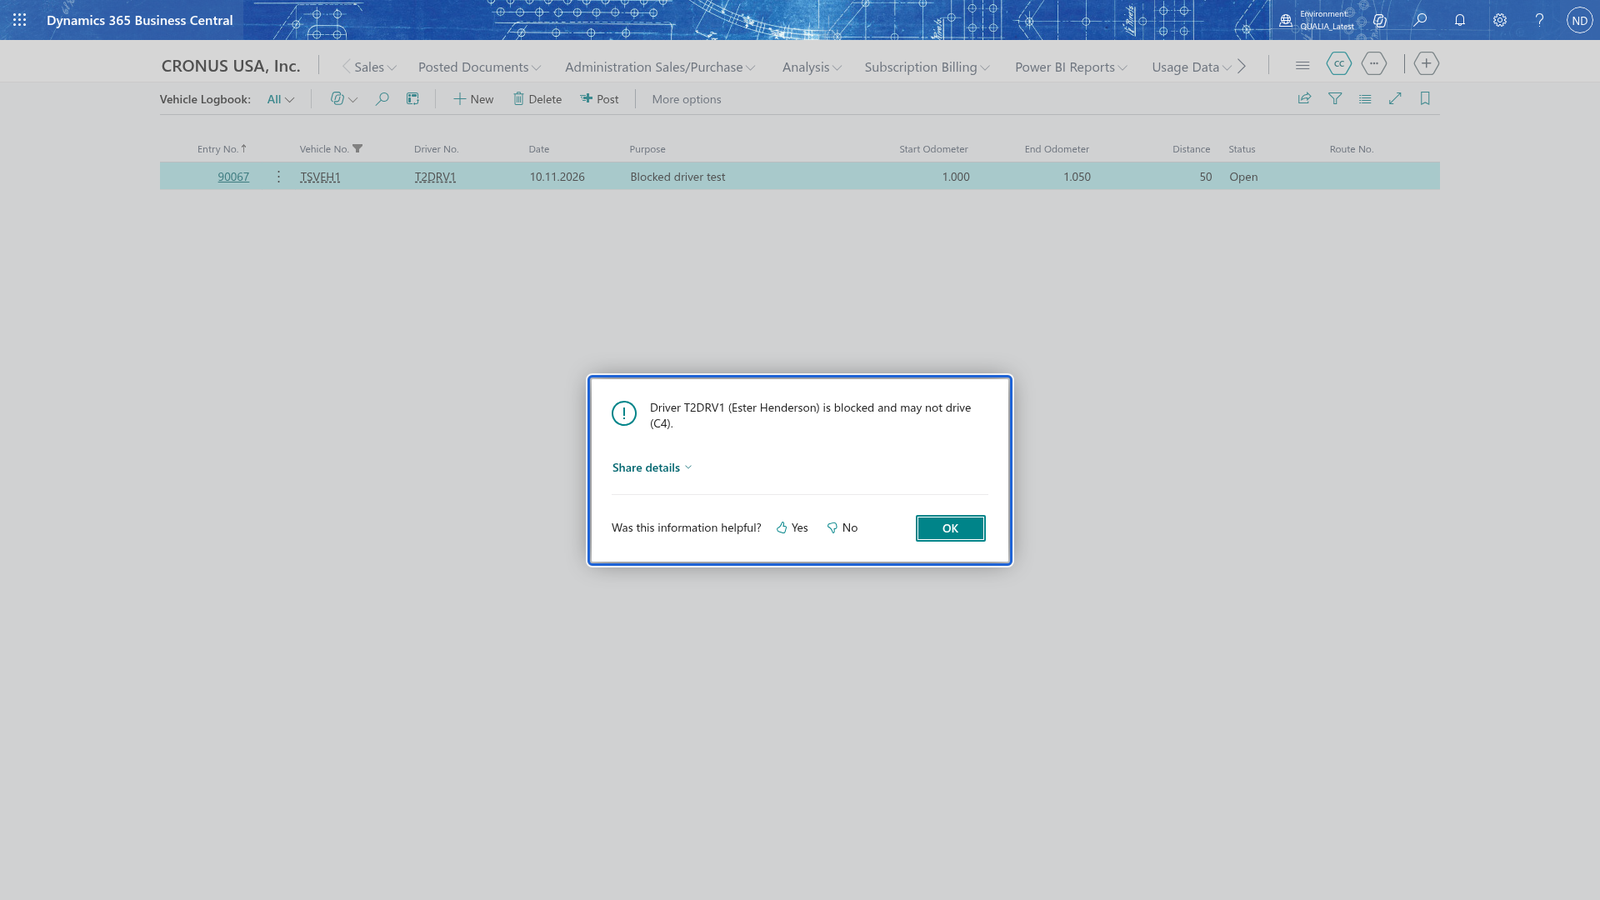
Posting is refused with a message that names the driver and says he is blocked and may not drive. Choose OK on the message, then enter a different driver on the trip, or remove Blocked on the driver's card and post again.
Note: When you post a trip or release a route, the app checks driver eligibility: the driver's Licence Categories must cover the vehicle's type (A motorbike, B car or van, C truck), the licence must be valid on the trip's or route's date, and Blocked must be empty. Otherwise the app shows a message naming the reason, such as a missing licence category, an expired licence or a blocked driver.
See that a driver without the licence category can't drive
A driver can only drive vehicles whose type his licence covers.
- Choose the search icon, enter Vehicle Logbook, and open the list.
- Choose New to open the Trip Card.
- In Vehicle No., choose the vehicle.
- In Driver No., choose a driver whose Licence Categories don't include the category for that vehicle type.
- In Date, enter the trip date.
- In Start Odometer, enter the odometer at the start of the trip.
- In End Odometer, enter a higher reading.
- Close the card.
- On the Vehicle Logbook list, select the trip's line and choose Post.
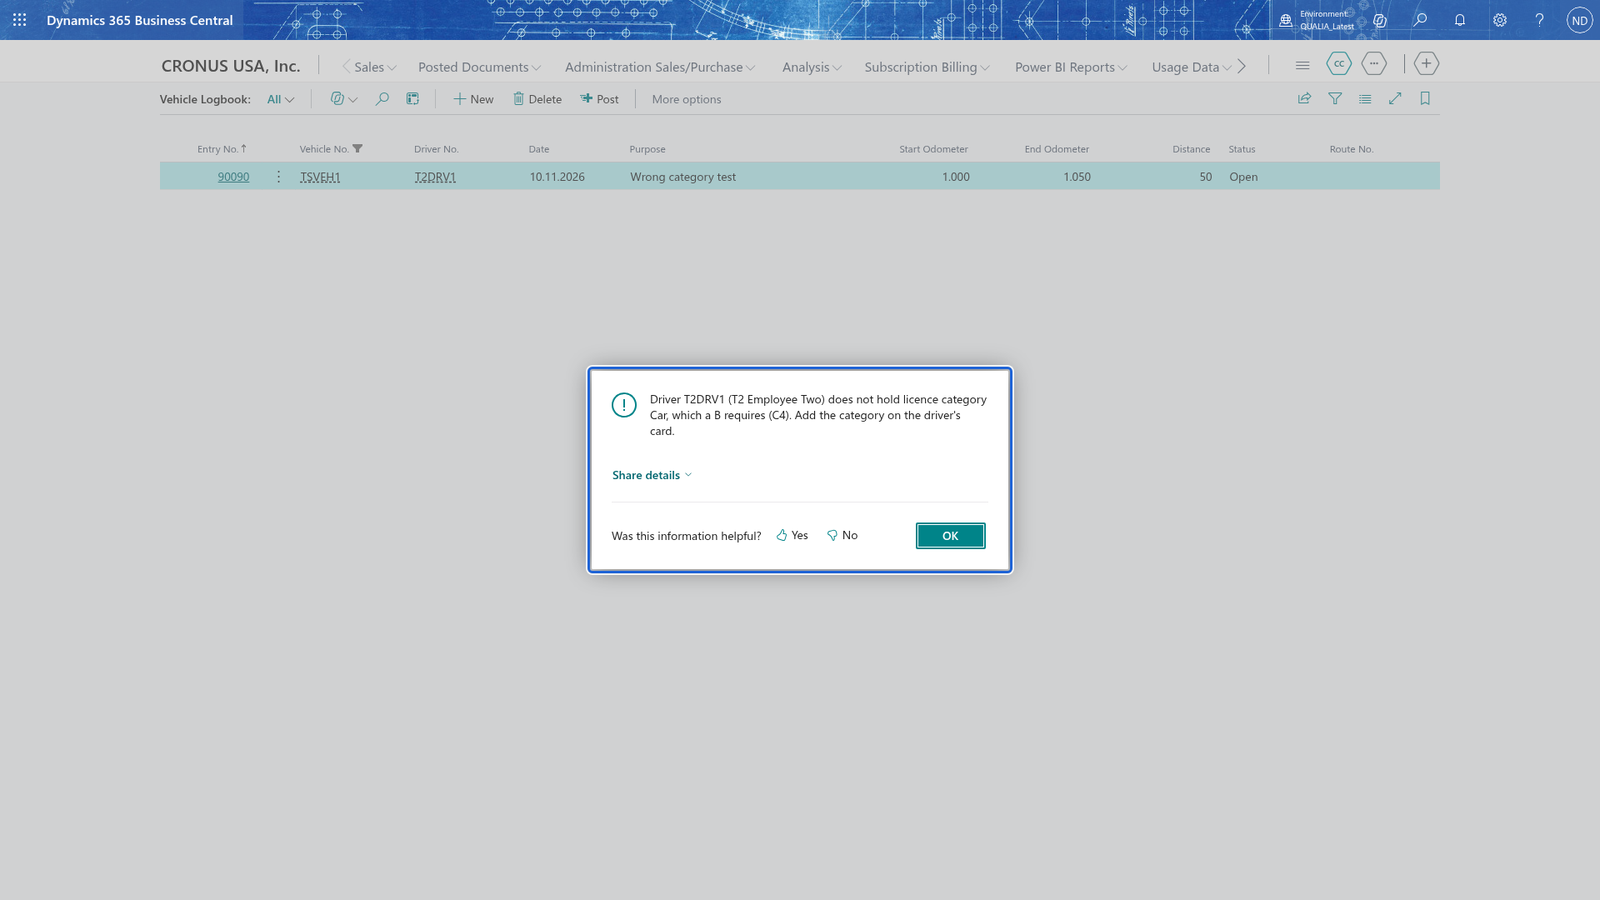
Posting is refused with a message that the driver does not hold the licence category the vehicle's type requires. Choose OK on the message, add the missing category on the driver's card (A for motorbikes, B for cars and vans, C for trucks) and post again, or choose a different driver or vehicle.
See that a driver with an expired licence can't drive
- Choose the search icon, enter Vehicle Logbook, and open the list.
- Choose New to open the Trip Card.
- In Vehicle No., choose the vehicle.
- In Driver No., choose the driver whose Licence Expiry Date is before the trip date.
- In Date, enter the trip date.
- In Start Odometer, enter the odometer at the start of the trip.
- In End Odometer, enter a higher reading.
- Close the card.
- On the Vehicle Logbook list, select the trip's line and choose Post.
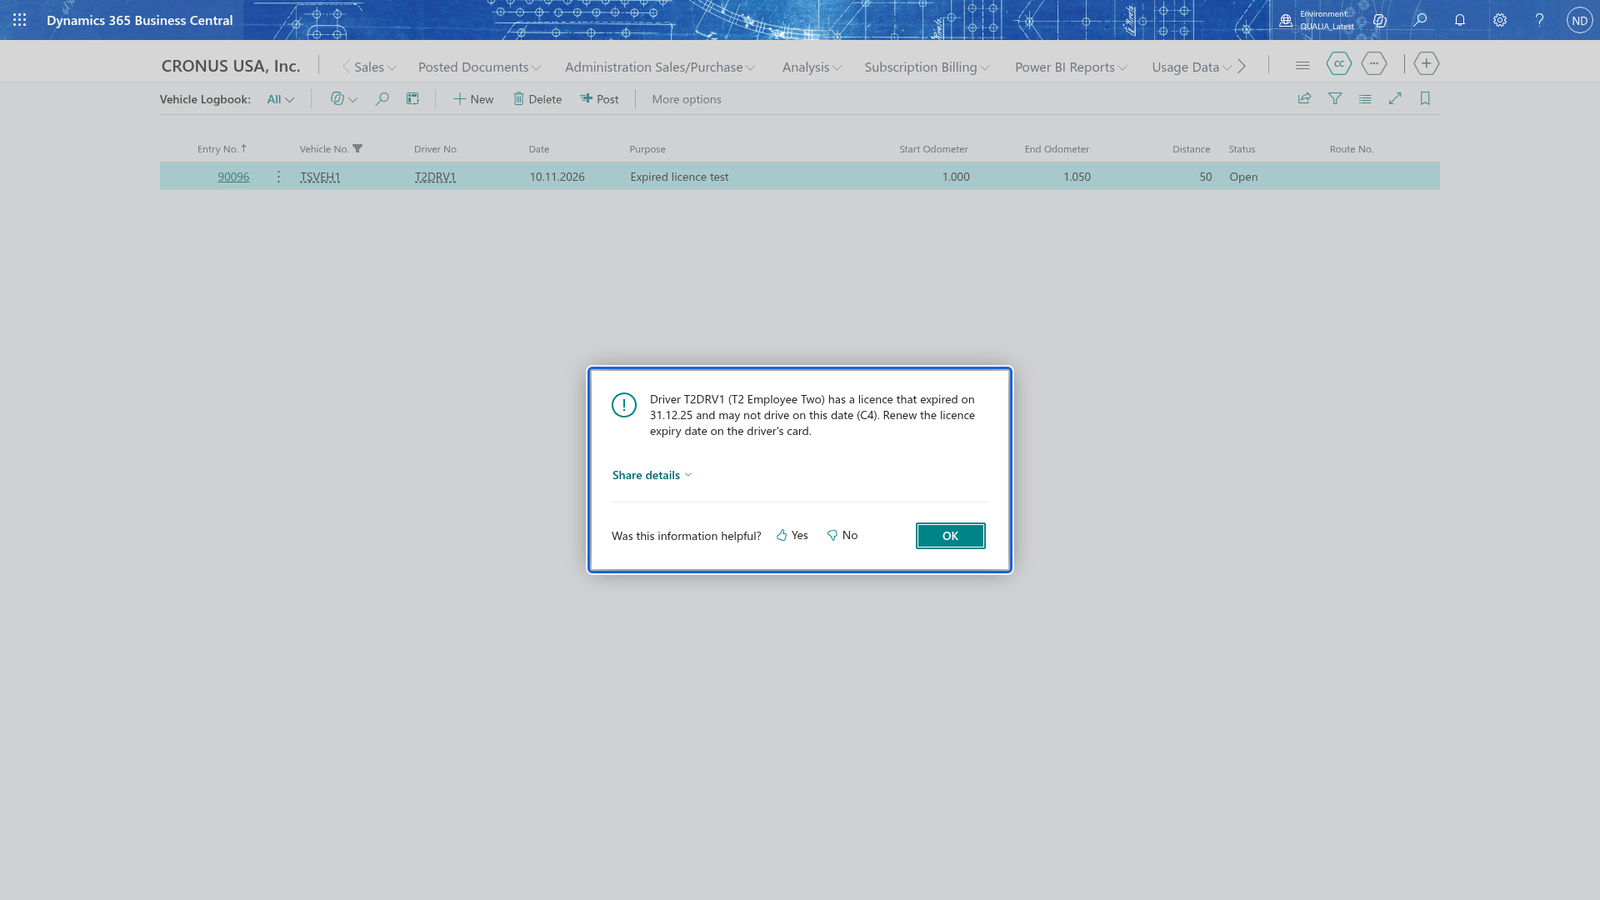
Posting is refused with a message naming the driver and the date his licence expired. Choose OK on the message, renew the Licence Expiry Date on the driver's card and post again, or enter the trip on a date within the licence's validity.