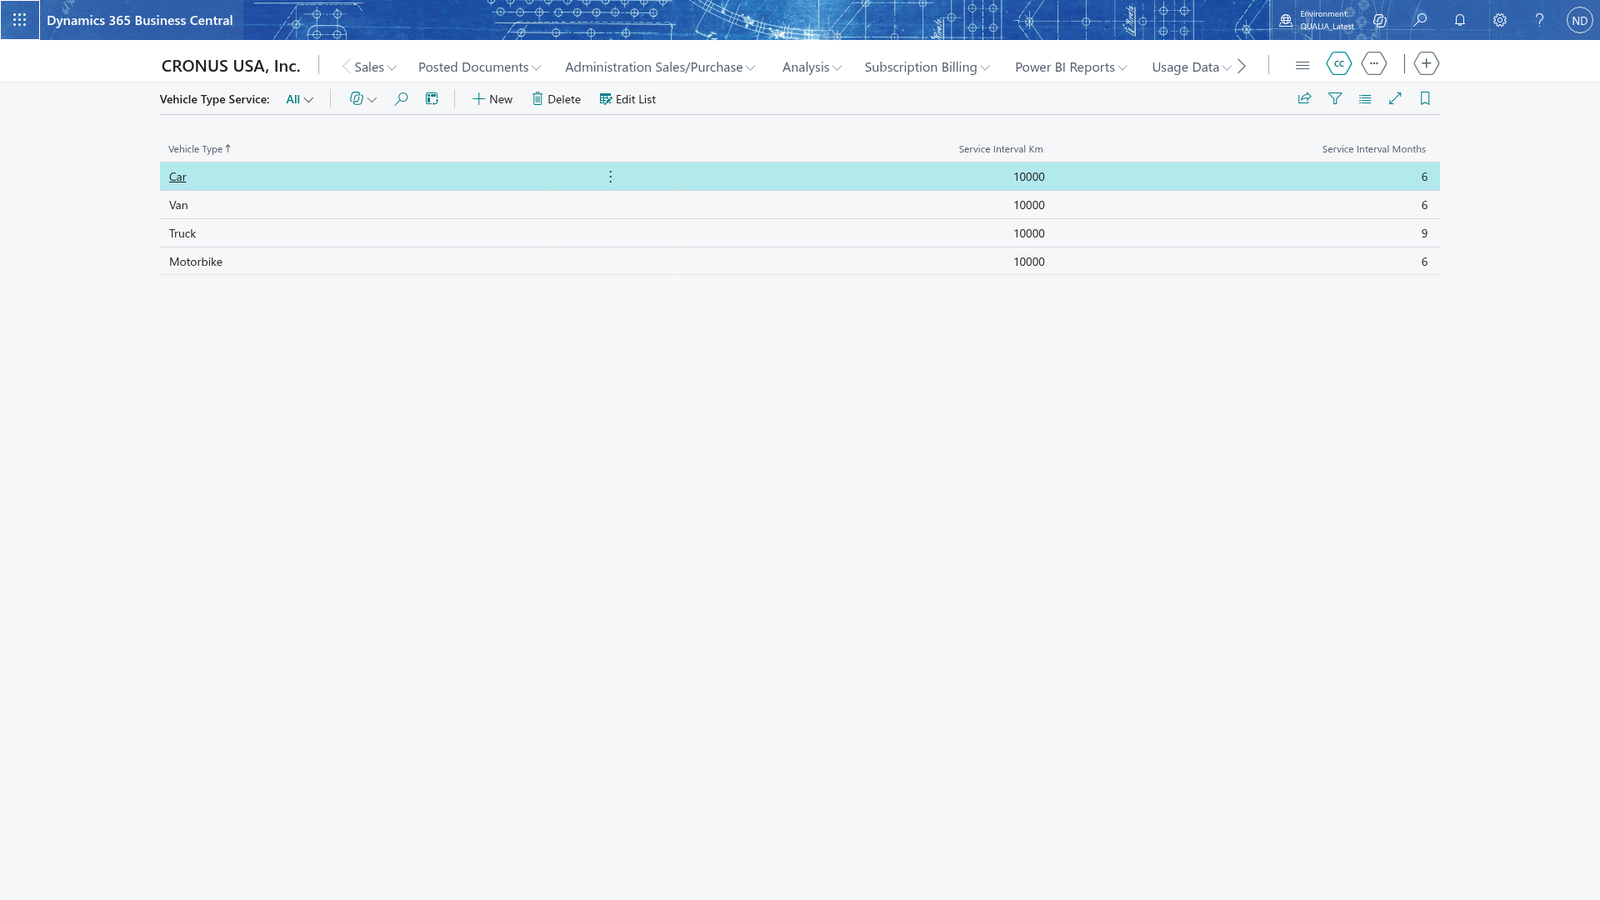
Company-agnostic install, standard data and access
The app is company-agnostic: every company that runs Business Central can install the app and use it for its own vehicles, drivers and deliveries. It works only with standard data - Locations, Employees, Vendors, Items, Sales Orders and No. Series - and nothing company-specific is built into it, so a fleet user can finish the setup from this section alone. All fleet data belongs to the company it was entered in: a record entered in one company is not visible in another. One permission set gives full access to the app. Before you create your first vehicle, driver or route, fill in the Fleet Setup page: the three number series that supply the vehicle, maintenance order and route numbers, and the warning period for documents that are about to expire.
Fill in the Fleet Setup
- Choose the search icon, enter Fleet Setup, and open the page.
- In Vehicle Nos., choose the number series that numbers your vehicles.
- In Maintenance Order Nos., choose the number series for maintenance orders.
- In Route Nos., choose the number series for routes.
- In Document Warning Period (days), enter the number of days before a document expires in which you want to be warned.
- Close the page.
The values are saved when you leave a field, and the Fleet Setup page shows them again the next time you open it.
Note: If the number series don't exist yet, create them first on the No. Series page (choose the search icon and enter No. Series) and then choose them here. The app takes vehicle numbers from the Vehicle Nos. series when you create a vehicle.
Note: Fill in all three number series before you create your first vehicle, maintenance order or route. If a series is missing, the app refuses the new record and names the series that is missing on the Fleet Setup, for example Set up Route Nos. on Fleet Setup before you create a route without a number.
Note: The warning period defaults to 30 days. Documents that expire within the warning period, and documents that have already expired, are shown on the Doc. to Renew list so that you can renew them in time.
Save a new warning period
You can change the warning period later; the new value is used for documents that expire from now on.
- Choose the search icon, enter Fleet Setup, and open the page.
- In Document Warning Period (days), enter the number of days.
- Close the page.
The next time you open the Fleet Setup, the new value is there.
Enter the service intervals per vehicle type
The service intervals per vehicle type decide when the next service of each vehicle is due.
- Open the Fleet Setup page and choose Service Intervals.
- Choose New.
- In Vehicle Type, choose Car, Van, Truck or Motorbike.
- In Service Interval Km, enter the distance in kilometres between two services.
- In Service Interval Months, enter the number of months between two services.
- Close the list.
A vehicle's next service is then taken from the interval in kilometres or the interval in months, whichever comes first.
Note: Set up the Fleet Setup in every company that uses the app. Each company has its own values, and fleet records entered in one company are not visible in another.
Change a service interval later
- Choose the search icon, enter Fleet Setup, and open the page.
- Choose Service Intervals.
- On the line of the vehicle type, enter the new value in Service Interval Km or Service Interval Months.
- Close the list.
The next service of the vehicles of that type is taken from the changed interval, in kilometres or in months, whichever comes first.
Give users access to the app
- Choose the search icon, enter Users, and open the page.
- Select the user, and then choose Edit to open the user card.
- On the Permission Sets FastTab, on a new line, choose the lookup on the Permission Set ID field and select FLEET.
With this permission set the user can open every fleet list and card and use every action.
The app is company-agnostic: every company that runs Business Central can install it and use it for its own vehicles, drivers, documents, trips, refuellings, maintenance and route planning. It works only with standard Business Central data (locations, employees, vendors, items, sales orders, transfer orders and number series), so no company values are hard-coded into it. All fleet data belongs to the company it was entered in: a record entered in one company is not visible in another.
Fill in the Fleet Setup
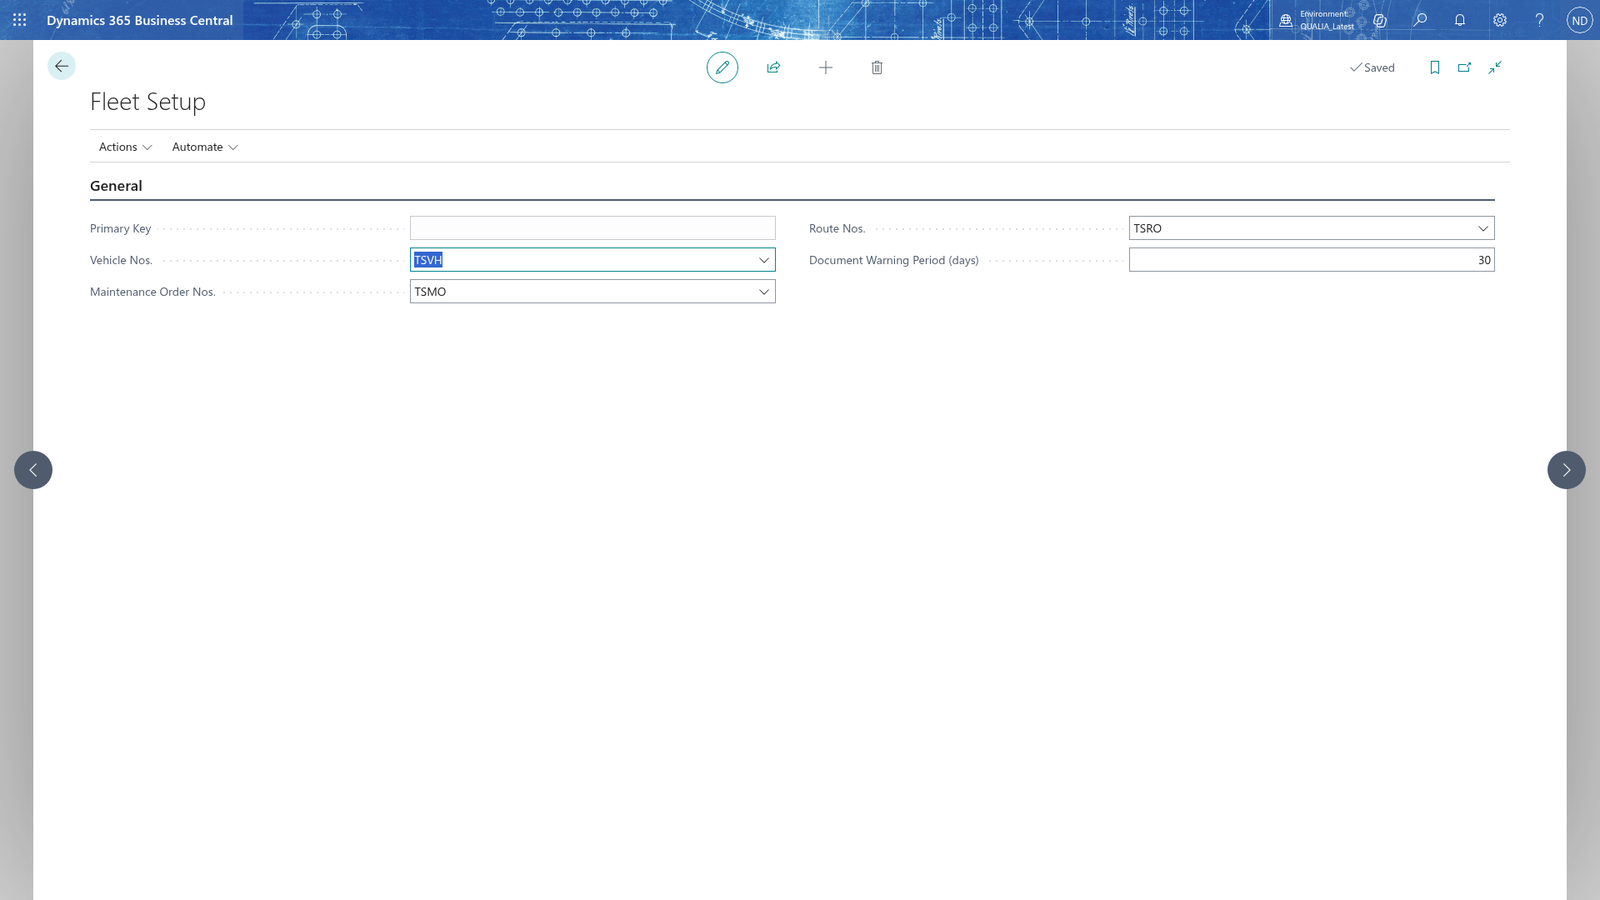
Fleet Setup holds the number series for vehicle, maintenance order and route numbers and the warning period for documents that are about to expire. The app creates its Fleet Setup record with the default warning period of 30 days the first time you open it, so you only fill in the three number series and check the warning period.
- Choose the search icon, enter Fleet Setup, and open the page.
- In Vehicle Nos., choose the lookup and pick the number series that provides vehicle numbers.
- In Maintenance Order Nos., choose the lookup and pick the number series for maintenance orders.
- In Route Nos., choose the lookup and pick the number series for routes.
- Check that Document Warning Period (days) shows the number of days before a document's Valid To when you want to be warned to renew it; the default is 30.
All four are filled in when you leave the page. Vehicles, maintenance orders and routes get their numbers from the series you chose, and documents that expire within the warning period show up for renewal.
Note: Fill in the Fleet Setup in every company that uses the app. Each company sets its own values, and fleet records entered in one company are not visible in another.
Save a new warning period on the Fleet Setup
The Document Warning Period (days) field decides how many days before a vehicle document's Valid To the app warns that it must be renewed.
- Choose the search icon, enter Fleet Setup, and open the page.
- In Document Warning Period (days), enter the number of days, for example 30.
- Close the page. The value is saved when you leave the field or the page.
The next time you open the document renewal list, the warning period you just saved applies.
Note: The warning period is kept per company. The value you save in one company does not change it in another.
Enter the service intervals per vehicle type
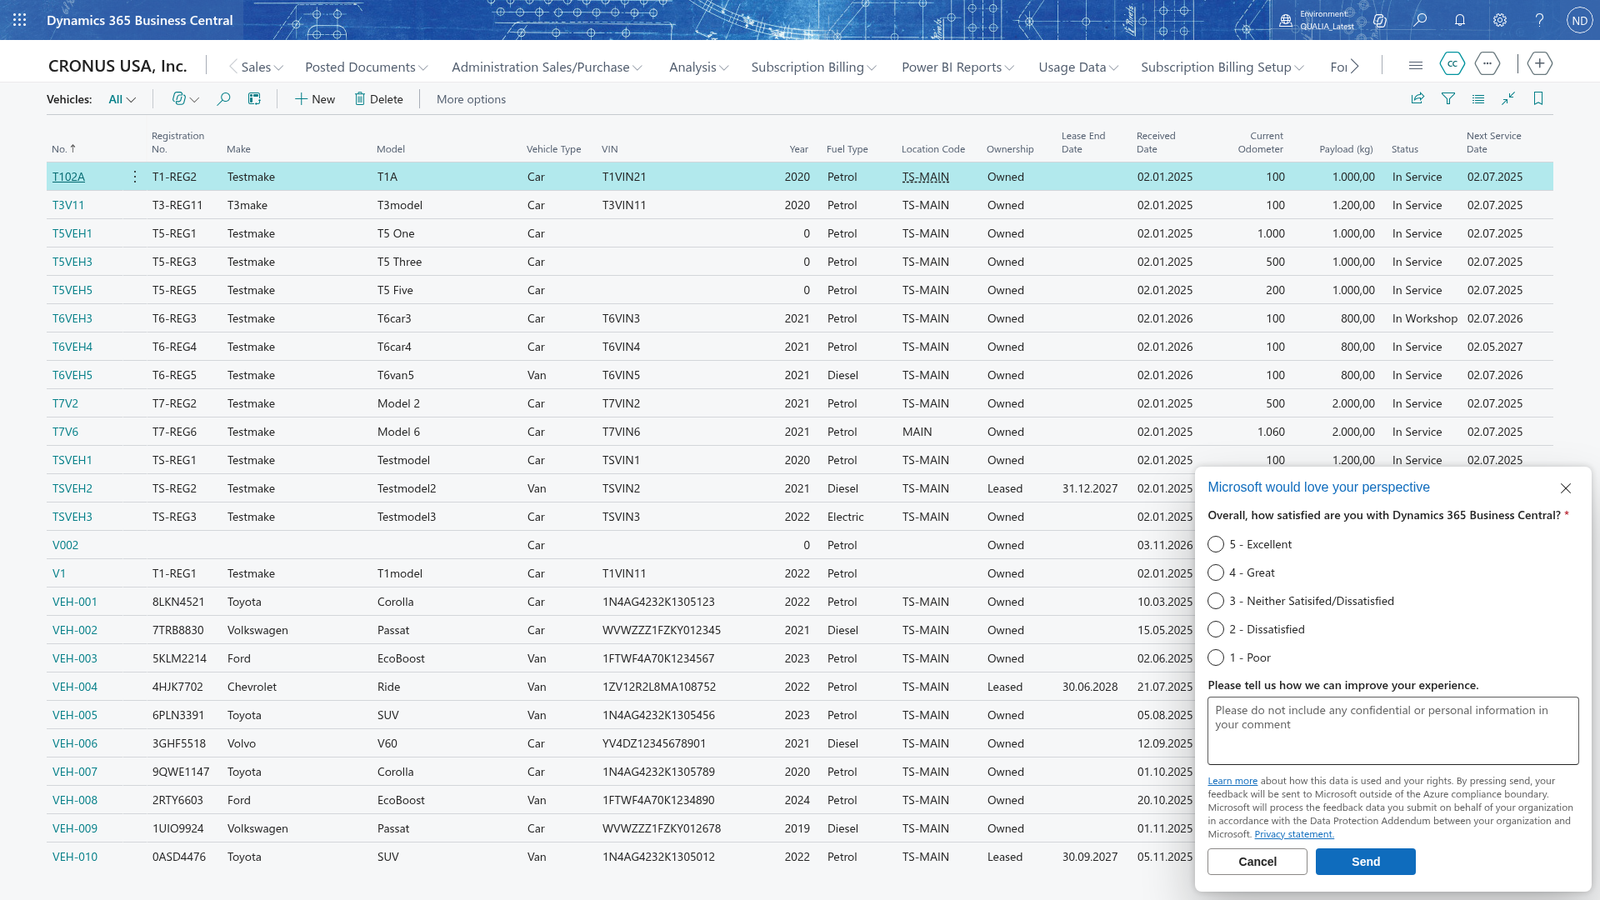
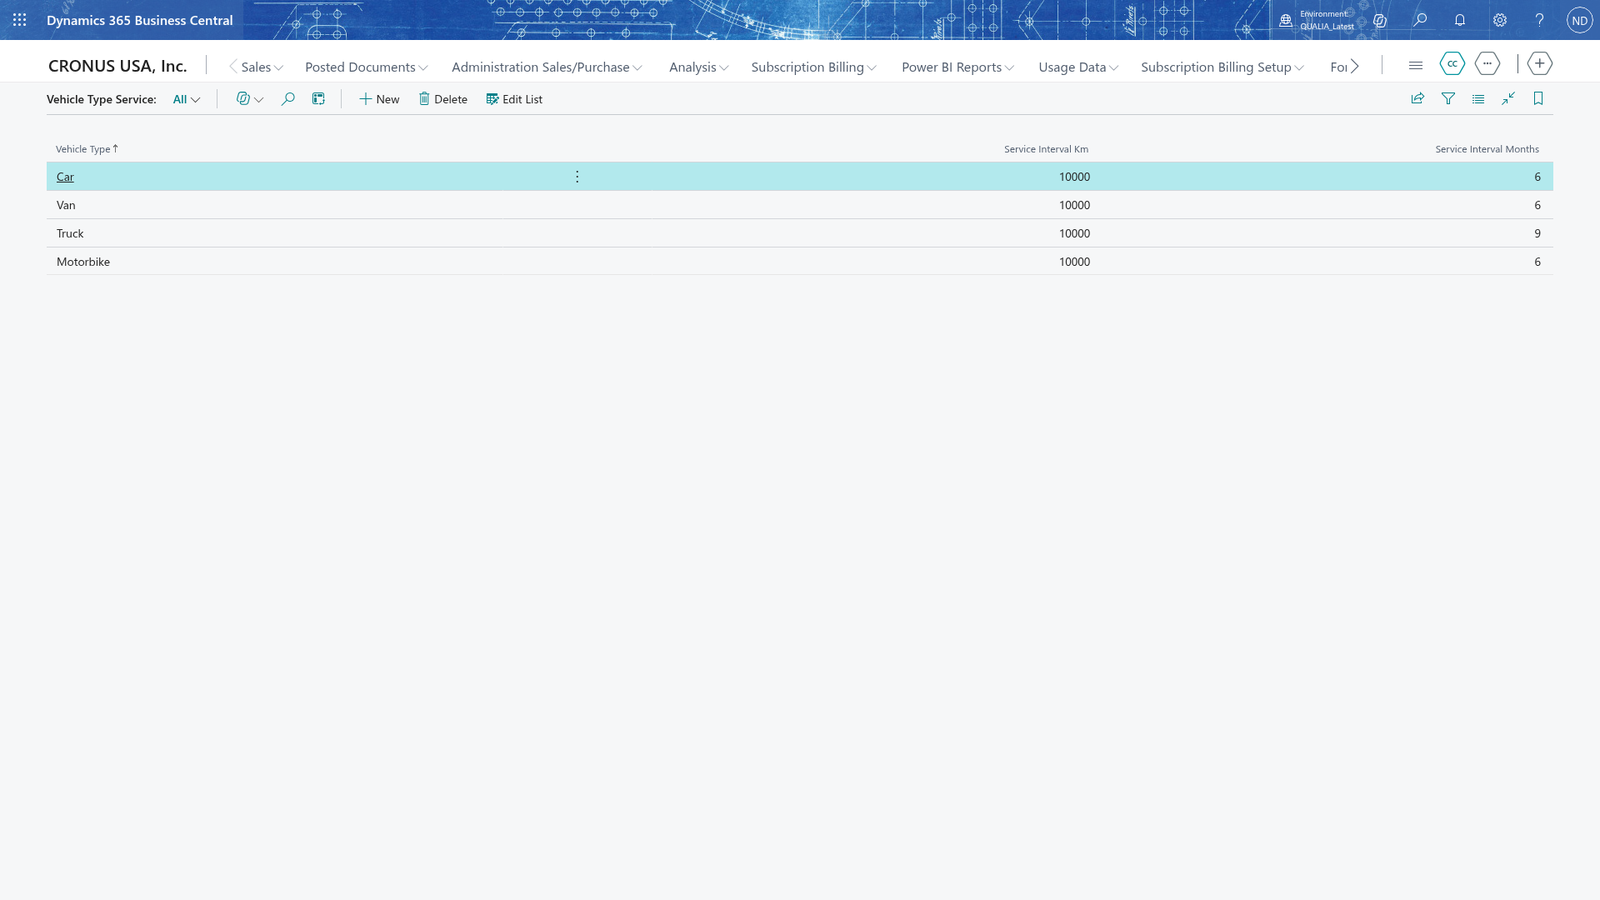
The app uses a service interval in kilometres and one in months for each vehicle type to calculate when a vehicle is next due for service. A vehicle is due for its next service as soon as either limit is reached first.
- Choose the search icon, enter Fleet Setup, and open the page.
- Choose Service Intervals.
- On a new line in the Vehicle Type Service list, choose the Vehicle Type.
- In Service Interval Km, enter the distance in kilometres between two services.
- In Service Interval Months, enter the number of months between two services.
- Close the list; the values are saved when you leave the field.
New vehicles of that type get their next service date and next service odometer from these two intervals, and every completed service recalculates them from the completion date and odometer.
Change a service interval later
Changing an interval only affects vehicles whose next service is calculated after the change, so a change made by mistake is worth correcting at once.
- Choose the search icon, enter Fleet Setup, and open the page.
- Choose Service Intervals.
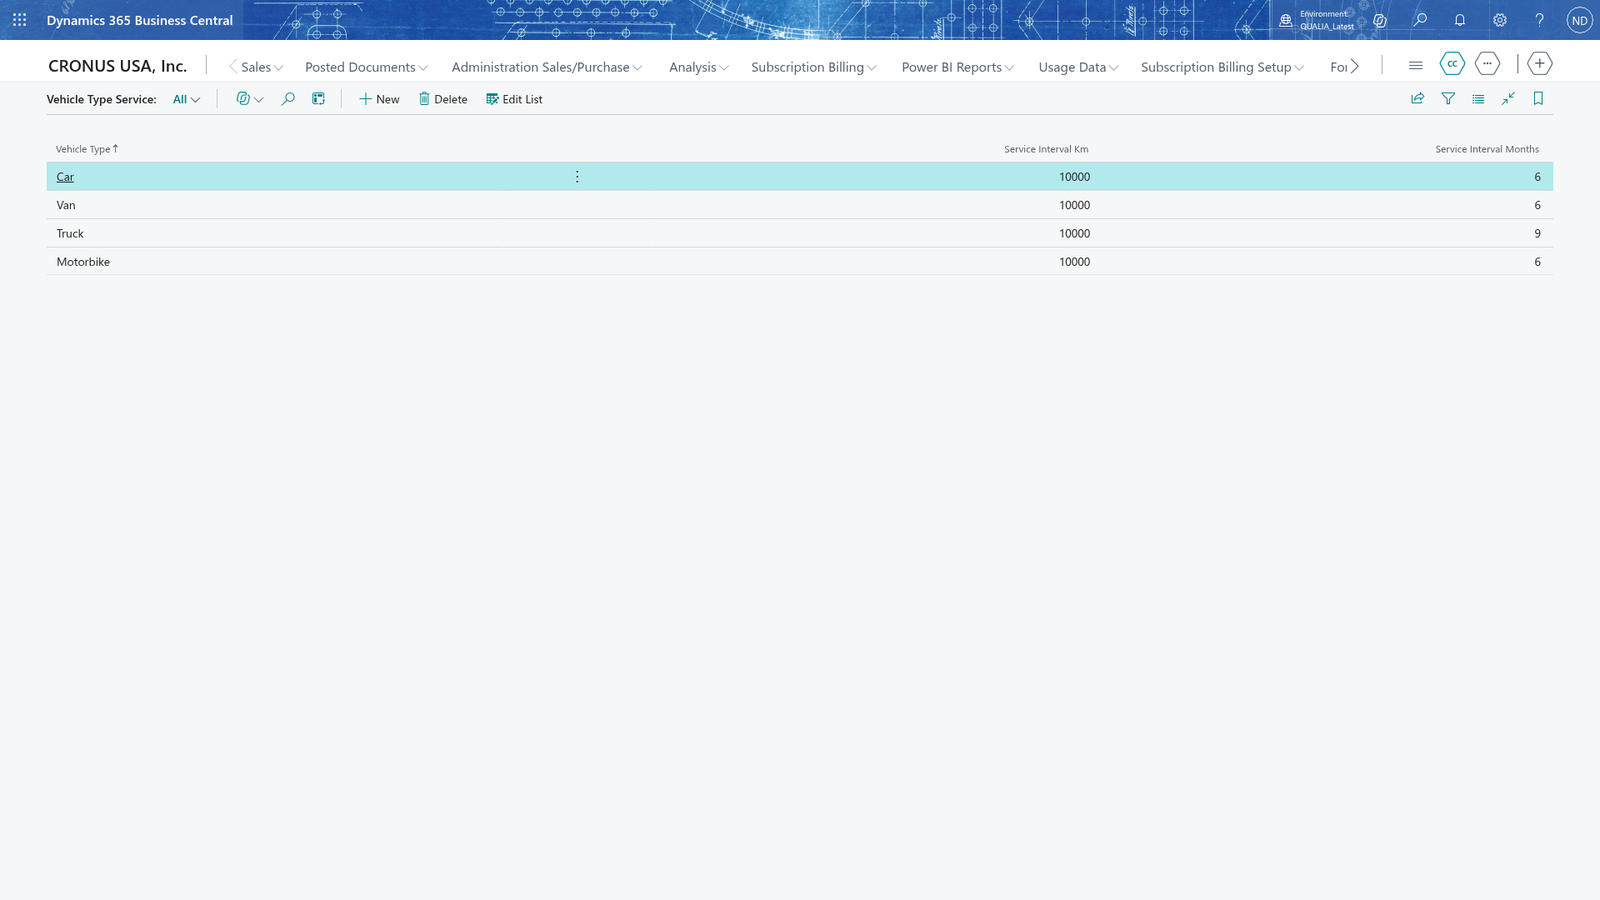
- On the vehicle type's line, change Service Interval Months to the new value, for example 12 for the Truck type.
- Close the list.
The interval now shows the new value in the Vehicle Type Service list.
Note: A service interval can be zero but never a negative number; a negative value is refused with the message "Service Interval Km must be greater than or equal to 0." (the same message names Service Interval Months if that field holds the negative value).
Give users access to the app
One permission set, FLEET, gives full access to the app: with it a user can open every fleet list and card and use every action.
- Choose the search icon, enter Users, and open the page.
- Select the user and choose Edit.
- On the Permission Sets FastTab, on a new line, choose the lookup on the Permission Set ID field and select FLEET.
The user can sign out and sign in again to see the fleet pages.
Note: Assign FLEET in every company that uses the app.