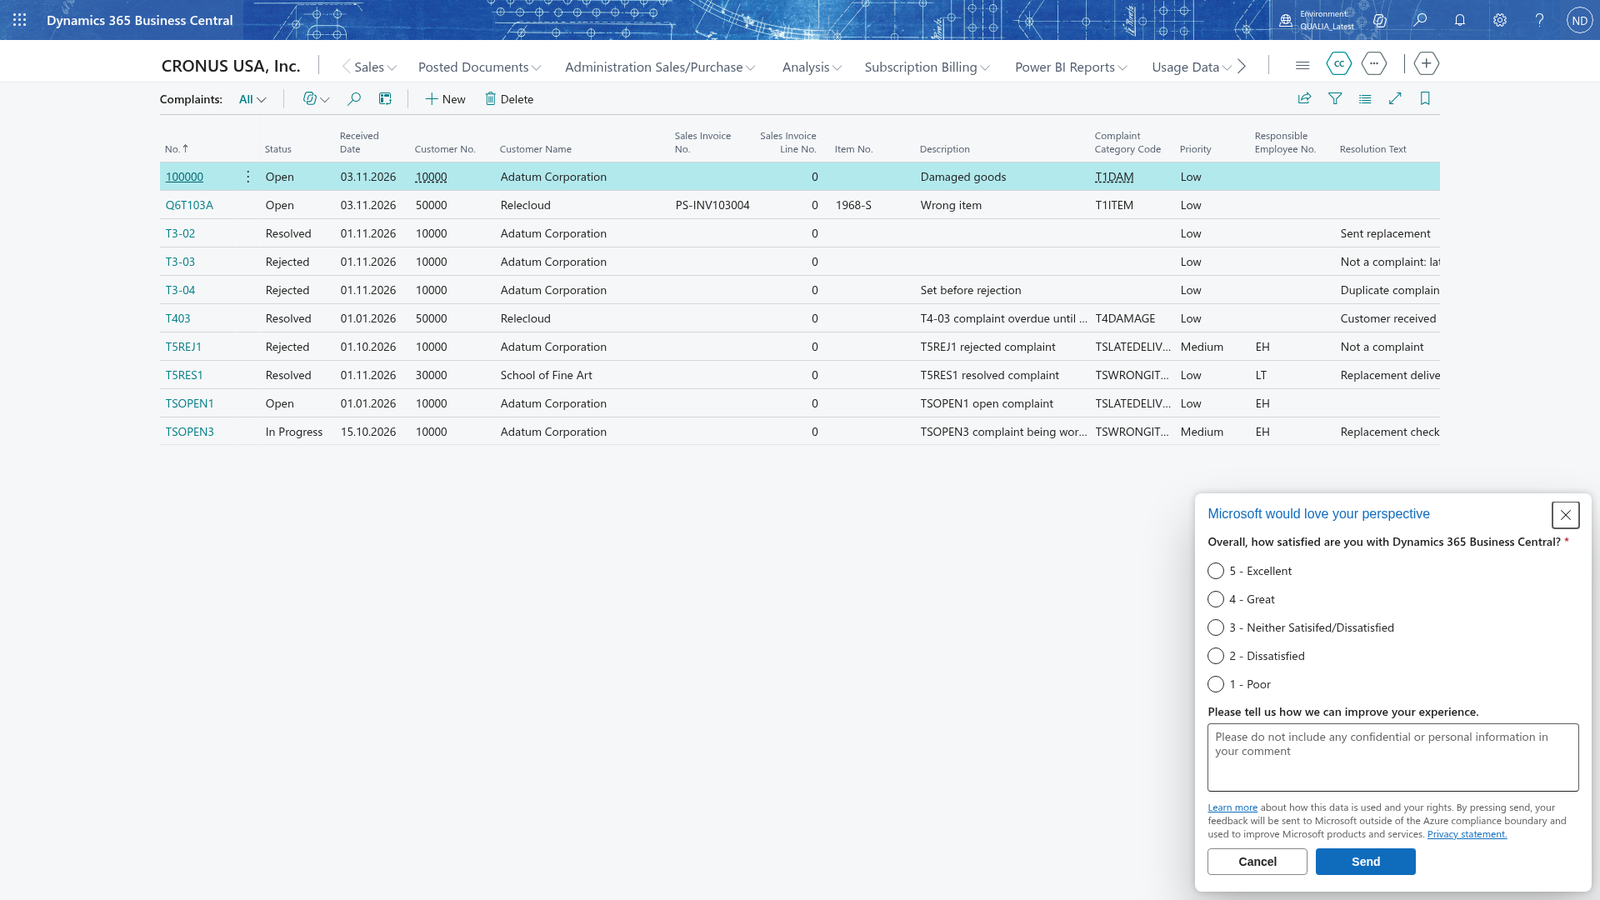
Record customer complaints
In this guide the screenshots show the app as it runs in the training company. The blue rectangle in the pictures marks the part of the page that matters.
When a customer reports a problem, you record it as a complaint in Business Central. Each complaint gets its own number from a number series and belongs to exactly one customer. You can also add the customer's posted sales invoice with one of its lines and an item, a category, a priority and a responsible employee.
Create a complaint from the Complaints list
- Search for Complaints and open it.
- Choose New.
- In Customer No., enter the customer who filed the complaint.
- In Received Date, enter the date the customer reported the problem.
- In Description, enter what the complaint is about.
- Leave the card to save the complaint.
The complaint is saved with its own number under Status Open. Customer Name is filled in from the customer you entered, and the complaint also appears in the Complaints list.
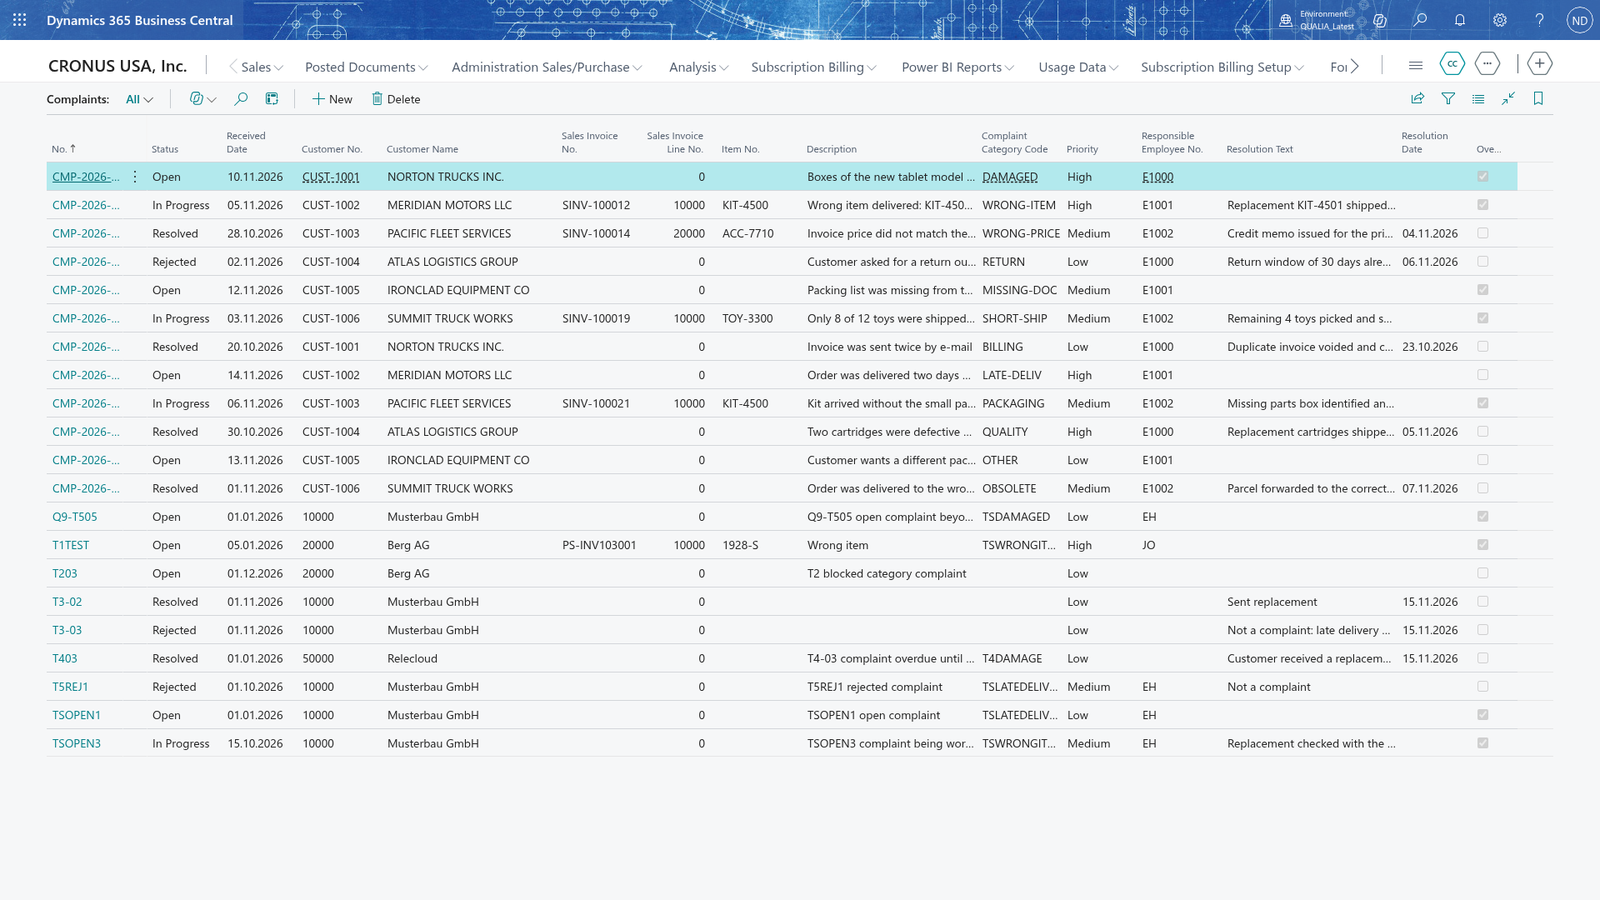
Note: You can also fill in Complaint Category Code, Priority and Responsible Employee No. before you leave the card, so the complaint is saved complete in one visit. The steps are in Add the category, priority and responsible employee.
Note: Customer No. is required: a complaint always belongs to exactly one customer. If you leave the card without a customer, the complaint is not saved and you see the message "Specify the customer before you create the complaint." Enter the customer and leave the card again.
Note: The complaint number in No. is assigned from a number series and can't be changed. While Complaint Nos. in Complaint Setup is empty, the complaint is not created at all: Business Central refuses it with a message that names Complaint Nos. of Complaint Setup. Fill in the number series as described in Set up complaints and create the complaint again.
Note: Received Date may be earlier than today, so you can record complaints that were reported in the past. It is not restricted to the current work date.
Add the category, priority and responsible employee
- Open the complaint from the Complaints list.
- In Complaint Category Code, choose the category of the complaint from the categories you maintain on Complaint Categories. You can't type a category that is not on that list.
- In Priority, choose Low, Medium or High.
- In Responsible Employee No., enter the employee who handles the complaint. This employee is picked from the standard Business Central employees.
- Leave the card to save the changes.
Note: If Description is still empty, it is filled in with the description of the category you chose.
Note: The category carries the response time after which the complaint is shown as Overdue on the card and in the Complaints list.
Note: If the employee you entered is blocked or no longer exists, the complaint shows an error when you open it again. Pick another employee before you leave the card, and the complaint is saved again.
Link the complaint to a posted sales invoice
- Open the complaint from the Complaints list.
- Enter the Complaint Category Code first; Business Central then lets you fill in the invoice fields.
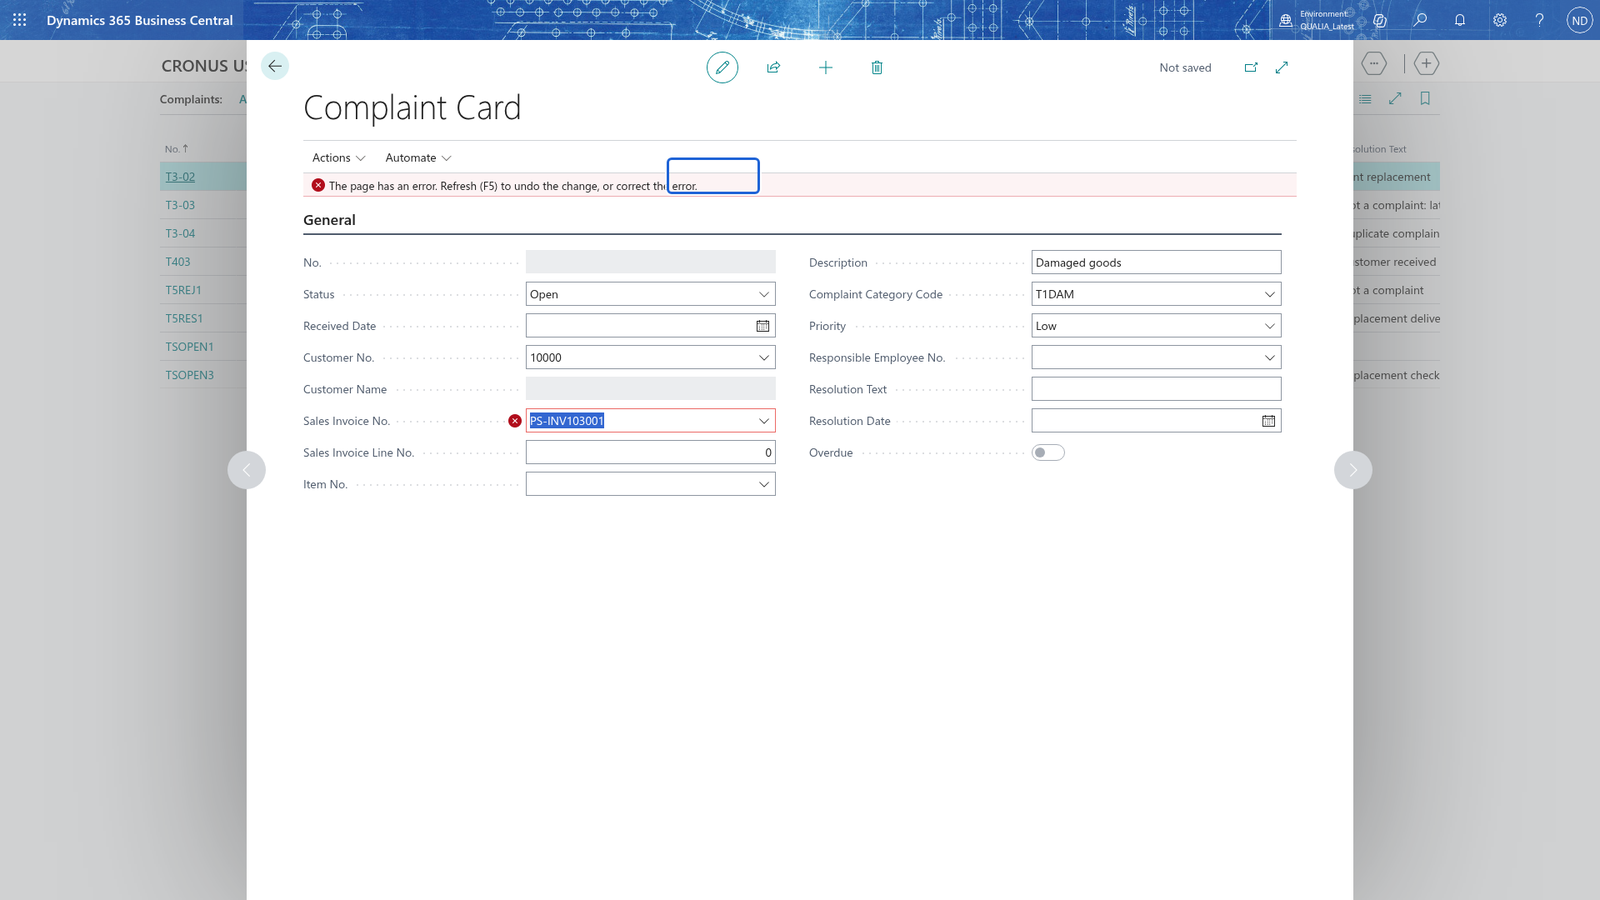
- In Sales Invoice No., choose the number of the customer's posted sales invoice.
- Leave the card to save the change.
Note: Sales Invoice No., Sales Invoice Line No. and Item No. are optional: enter them only when the complaint refers to a customer's posted sales invoice.
Note: The sales invoice must belong to the customer you entered in Customer No. If you enter an invoice of another customer, Business Central refuses it with the message that the sales invoice does not belong to the customer; enter the invoice number of your customer instead. Focus on that message in the picture.
Add the sales invoice line number
- Open the complaint from the Complaints list.
- Enter the Sales Invoice No. first, so that you can pick a line of that invoice.
- In Sales Invoice Line No., pick the number of the invoice line the complaint is about from the lines of the invoice.
- Leave the card to save the change.
Note: The line number you pick must exist on the invoice in Sales Invoice No. If it doesn't, Business Central refuses it with the message that the line does not exist on the sales invoice; pick the number of a line on that invoice. Focus on that message in the picture.
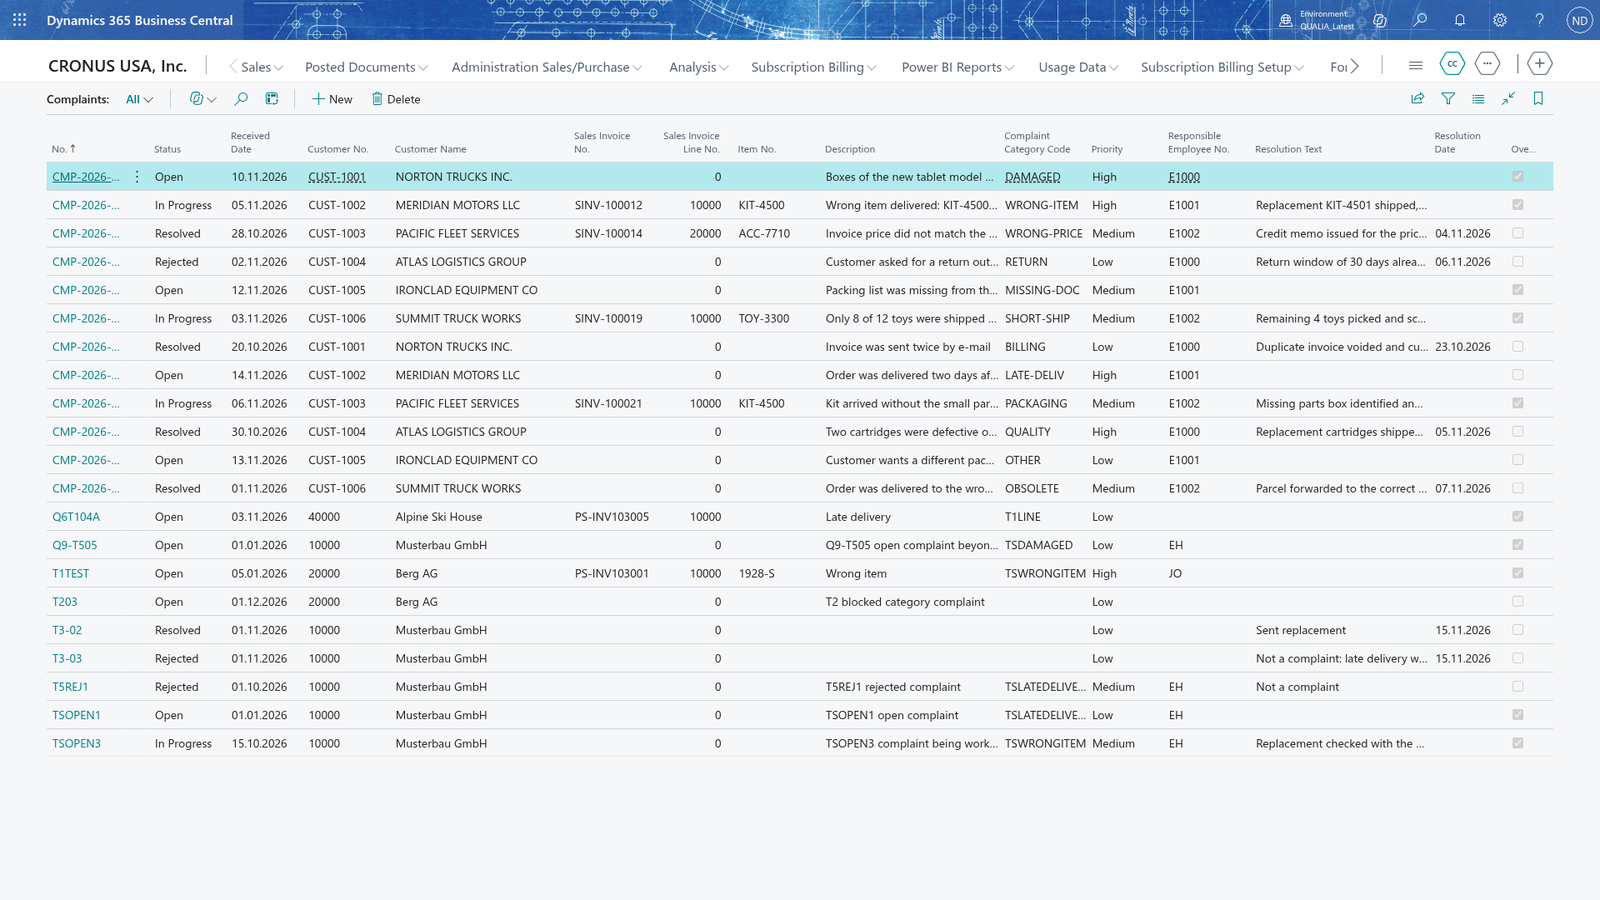
Add the item from the invoice
- Open the complaint from the Complaints list.
- Enter the Sales Invoice No. first, so that you can pick an item from the lines of that invoice.
- In Item No., pick the item the complaint is about from the lines of the invoice in Sales Invoice No.
- Leave the card to save the change.
Note: The item must be a line of the invoice in Sales Invoice No. If it isn't, Business Central refuses it with the message that the item is not a line of the sales invoice; pick an item that is on that invoice. Focus on that message in the picture.
Note: Business Central also checks the item when you enter or change it after the invoice number, so the three fields must always fit together.